
![]()
DaVinci Resolve used to be a professional software designed for Hollywood's elite colorists. The software has been used in plenty of famous films, television series used for color grading, restoration, and editing. But now, you can use it to edit video without being a pro. Since 2010, DaVinci Resolve was acquired and redesigned by Blackmagic Design instead of da Vinci Systems, the number of users increased from 100 to over 2 million. The reason is that Blackmagic Design also launched DaVinci Resolve Lite, a free edition with reduced functionality, alongside the continuing commercial options.
This free edition is widely used and well-received. If you are one of the Hollywood fans who dreams to be a professional video editor, you can practice with DaVinci Resolve free edition. Besides that, iTunes movies can be good material for practicing. However, iTunes videos are all protected by DRM, Apple's Digital Right Management scheme, so you can't import them to DaVinci Resolve directly. In the next section, we will show you how to remove DRM and convert iTunes M4V videos to a format supported by DaVinci Resolve. Stay tuned!
The Tool You'll Need
To remove DRM and convert M4V video, usually, you'll need a DRM remover and a video converter. Luckily, we have a 2 in 1 solution for you - TunesKit M4V Converter. Also, TunesKit serves as a video editor and media player. Here we list what TunesKit can do for you.
- A one-stop converter to losslessly strip DRM from iTunes M4V movies, TV shows, and videos
- Convert Both DRM-ed and DRM-free format to over 20 popular formats, (MP4, M4V, MKV, WMV, MPEG1, MPEG2, AVI, ASF, 3GP, and FLV)
- Offers a built-in video editor with which you can trim, cut the videos to small clips, or add watermarks and subtitles
- Retain AC3 5.1 Dolby surround sound, AAC stereo tracks, AD, CC, subtitles, and chapters
How to Add iTunes Videos to DaVinci Resolve
Step 1Add iTunes Videos to the Converter
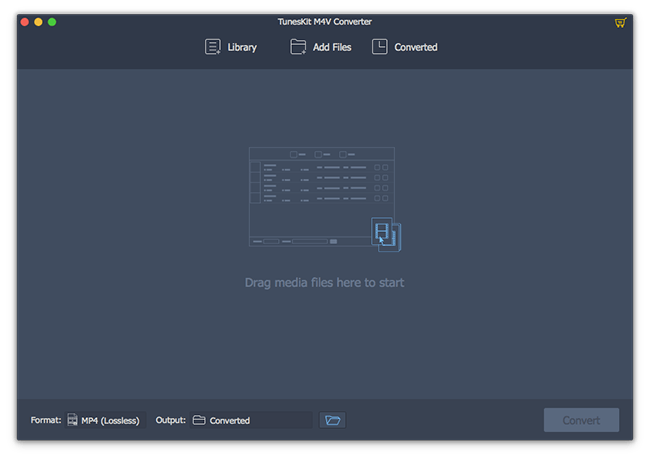
First, Download TunesKit DRM Media Converter from the link above and install it on your PC. Make sure that iTunes is well-installed in your computer and then download the videos you want to convert in advance. Then launch TunesKit and iTunes will be launched automatically. From the main interface, you can see on the top center of the surface, there are 3 buttons: "Library" is to import DRM-ed files, "Add Files" is to add non-DRM files, "Converted" is to store the converted files. Here we should click "Library" to import videos from iTunes. Wait a window pops up and then select the videos and click the "OK" to load them to TunesKit. Directly drag the iTunes videos from your iTunes media folder to the converter is another way to import videos.
Step 2Select Output Format and Parameters
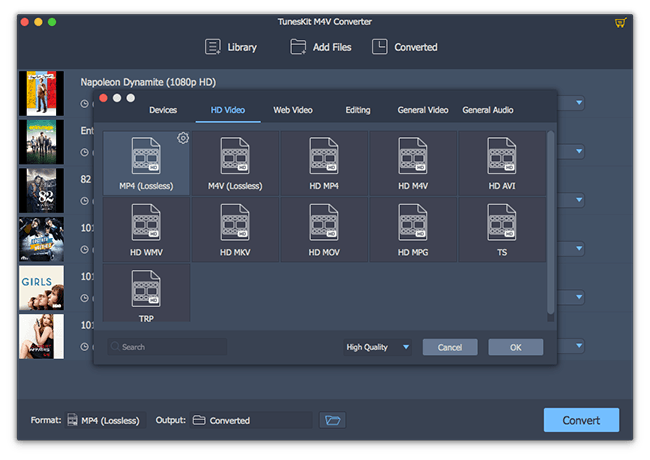
After the video is successfully added to the converter, you can click on "Format" panel to select the output device, video quality, video, audio format and other parameters at your will. Since DaVinci Resolve supported formats includes avi, r3d, m2ts, mp4, mxf, prores, dnxhd, mxf, dpx, cin, exr, mov, etc, we recommend you choose AVI or MP4 as the output format. On the right hand of the column of each video, you can adjust the output audio track and subtitle. Click the "Edit" icon, you can do some simple editing before you edit the video in DaVinci Resolve.
Step 3Remove DRM and Convert M4V Videos
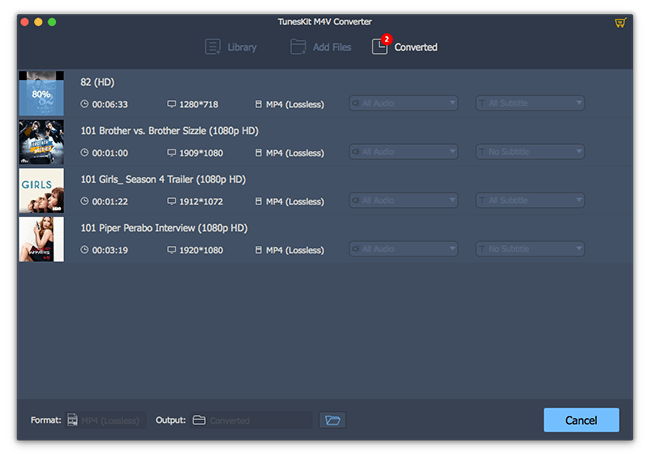
After you finish the settings, you can start to remove DRM from the movies. Click "Convert" at the bottom right to accomplish that and you can find the unprotected movies under the "Converted" history. They were placed in the folder you decided. Before importing them to DaVinci Resolve, you can have a preview with the embedded media player of TunesKit.
The Final Thoughts
Now you're all set and you can edit iTunes videos in DaVinci Resolve. TunesKit enables you to convert iTunes Movies to any popular format you like and enjoy the playback anytime anywhere. So just give it a try and you will like it!

Fatima Cook An amateur writer from Freelance, who is skillful at technology review, news and tips.
