


Most people know VLC Media Player as a free tool for playing almost any type of video or audio file, but it can actually do a little more than that. Hidden inside its features is a recording option that lets you capture audio from videos, online streams, microphones, and other sources without needing another program.
That said, recording audio with VLC is not as simple as pressing a record button. Some settings need to be adjusted first, and the available editing and output options are quite limited compared with dedicated audio recorders. In this guide, we'll walk you through how to record audio with VLC Media Player on Windows and Mac, show you how to fix common recording problems, and share a few alternatives if you need a more convenient way to record and edit audio. Let's dive in.

Part 1. Can I Record with a VLC Media Player?
Yes, VLC Media Player can record audio, although this feature is not as obvious as its playback functions. Besides playing videos and music, VLC includes a built-in recording option that allows you to capture audio from media files, online streams, microphones, and other input sources.
However, VLC is not designed as a dedicated audio recorder. The recording process can be a little complicated, and it offers limited control over output formats, audio quality settings, and editing options. For simple tasks like saving a short clip from a video or capturing basic audio input, VLC can get the job done. But if you want to record streaming music, podcasts, or live audio with better quality and more flexibility, a specialized audio recording tool may be a better choice.
Part 2. How to Record Audio Using VLC Media Player
VLC Media Player comes with a built-in recording feature, but it records not just through a record button. You need to enable the recording controls first, choose the right audio source, and adjust the output settings before starting. The process is slightly different on Windows and Mac, so follow the guide below to record audio with VLC on your device.
On Windows
01Install and launch the VLC Media Player, click the "View" tab in the top menu bar of the main interface.
02Tap on "Advanced Controls" in the drop-down menu, which will set a new row of controls, prominently featuring a record button positioned above the play button.

03Click the "Media" tab in the top menu bar, then "Open Capture Device" in the drop-down menu.

04In the pop-up window, choose the Capture mode you like.
To capture audio from your computer's system, choose "Desktop".
To record audio from a microphone, select "DirectShow" as the source.
05Then click "None" in Video device name and choose an audio source in Audio device name.
06Click the pointing down triangle icon next to the "Play" button and select the "Convert" bar to make further settings.

07Select an audio format as you like by clicking the "Profile" bar.
08Tap on "Browser" beside the "File destination" to choose a folder to save your recordings.
09Once all the settings are done, click "Start" at the lower-right corner to begin recording.

10When you want to finish the recording, press the red button at the lower-left corner to stop it, and click the square button at the bottom control bar to save the audio file in your computer.

On Mac
01Download and open VLC Media Player, click "File", then "Open Capture Device".

02Click "Capture" in the pop-up window, and select "Input Devices". Toggle the Audio and select an audio source, then click on "Open".

03After returning to the main interface, click on "Playback" in the top menu bar, then click the "Record" to start recording.

04Tap on the square stop button at the lower-left corner to finish recording.
05Navigate to the "Finder", locate the music folder on the left side column and you can find your recordings.

Part 3. How to Fix VLC Media Player Audio Recording Issues
If your VLC fails to record audio, creates silent recordings, or has sound playback problems, this is usually related to audio permissions, incorrect input settings, or VLC configurations. You can try the simple fixes to get it working again.
Check Audio Permissions: Make sure VLC is allowed to access your microphone or audio devices. On Windows, go to Settings > Privacy > Microphone and enable microphone access for apps; on Mac, open System Settings > Privacy & Security > Microphone and allow VLC to use the microphone.
Select the Correct Audio Input Source: If VLC records no sound, it may be using the wrong audio source. Open VLC and go to Media > Convert / Save > Capture Device. Check the Capture mode and select the correct option, such as Desktop for system audio or DirectShow for microphone input. Make sure the correct audio device is selected.
Enable VLC Audio Settings: If you cannot hear audio from your recordings, check VLC's audio preferences. Open Tools > Preferences (or VLC > Settings on Mac). Go to the Audio section and make sure audio is enabled. Try setting the audio output module to Automatic.
Check the Audio Track: Sometimes the recording contains audio, but VLC is playing the wrong track. During playback, go to Audio > Audio Track. Select another available track or switch the track off and on again. If the sound is out of sync, adjust the audio delay in VLC's synchronization settings.
Update or Reset VLC: VLC recording problems can also be caused by bugs or incorrect settings. Update VLC to the latest version through Help > Check for Updates. If the issue continues, reset VLC preferences to restore the default settings.
If VLC still cannot capture audio properly, especially from streaming services, using a dedicated audio recorder may provide a smoother recording experience.
Part 4. Best VLC Media Player Alternative to Record Streaming Audio
VLC Media Player is a convenient option for recording audio, but it lacks built-in editing features. If you need to trim recordings, remove unwanted sections, or make further edits, you'll need a dedicated audio recorder or editor. Here we'll introduce two useful alternatives—ViWizard Audio Capture and Audacity—and show you how to use them step by step.
ViWizard Audio Capture
While VLC Media Player can record audio from some sources, it is not designed for flexible streaming audio capture or post-recording editing. For users who need a more convenient way to save and manage streaming audio, ViWizard Audio Capture is a practical VLC alternative.
Unlike VLC, ViWizard Audio Capture also provides basic editing features, letting you trim unwanted parts and organize recordings before saving. You can export files in popular formats like MP3 and WAV, then play them anywhere, anytime.

Key Features of ViWizard Audio Capture
Free Trial Free Trial* Security verified. 5, 481,347 people have downloaded it.
- Record streaming audio and system audio from different sources
- Capture music, podcasts, and online audio content
- Export recorded audio in 17 formats for different devices and platforms
- Record audio automatically without saving tracks individually
- Organize captured audio files with customizable output options
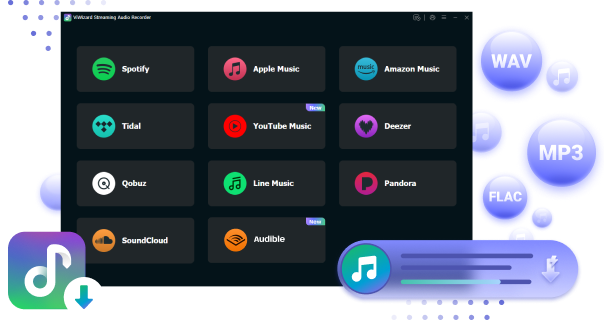
 Step 1: Install ViWizard Audio Capture and Add Your Audio Source
Download and install ViWizard Audio Capture from the official website. Open the program and click "Select/Add an App" to choose your audio source. You can add a web browser, like Chrome, Firefox.
 Step 2: Customize the Output Settings
Click the "Format" button at the bottom-left corner to choose your preferred output format, such as MP3 or WAV. You can also adjust the bitrate and sample rate to balance audio quality and file size based on your needs.
 Step 3: Record Streaming Audio
Click "Start" in ViWizard Audio Capture. Then open the target website and play the audio. The tool will automatically capture the audio from your selected source. After recording finishes, click "Stop" and check the captured track in the recording list.
 Step 4: Edit, Export, and Manage Your Recordings
Before saving, you can trim unwanted sections or make simple edits to your recording. Click "Save" to export the audio file, and all saved recordings will be stored in the History section for quick access. Unlike VLC Media Player, ViWizard Audio Capture also gives you basic editing options after recording, making it a more flexible choice when you need to capture and refine streaming audio from different platforms, and most importantly safely.
Audacity
Audacity, a freely accessible open-source digital audio editor and recorder, boasts versatility in capturing audio from diverse sources, including the computer's internal speaker. It supports various recording formats, like MP3, WAV, Ogg Vorbis, and more. Below is a full guide outlining the steps to record audio with Audacity.
01Start Audacity and Configure Audio Host
01Launch Audacity and navigate to the toolbar, where you should click on "Edit."
02In the drop-down list, select "Preferences."

03Within the Preferences window, locate and click on "Audio Settings" in the left-hand navigation panel.
04Select an option from the "Host" dropdown menu, such as "Windows WASAPI."

02Select Recording and Playback Devices
01Still in the interface of "Audio Settings", Under "Playback" section, choose the device used to listen to the audio, such as Speaker and Headphone.
02Under "Recording" section, select the loopback input option to capture the audio output from the playback device.
03Tap on "OK" to save the settings.

03Begin Recording Audio
01Click on the red "Record" button in the toolbar to start recording.
02Ensure that the application in which you are going to record audio is open.
03Once the recording is done, stop the audio playback in the application. Don't forget to click the "Stop" button in Audacity as well.

04Export and Save the Recording
01After finishing the recording, you are free to make edition to it, such as trimming.

02Click on "File" in the top toolbar and then "Export" > "Export Audio…" to open the Export Audio window.

03Select the audio format as you like and choose the location you are going to save the audio file.
04Click "Save" to export the recording.

Once you conduct the recording within the Audacity, you will find Audacity is much more professional and full-featured in editing the recordings. However, for a beginner, it can be challenging and complicated to perform recording with a big control panel and abundant plugins. Also, sluggish response or lag may occasionally happen when working on multi-track audio projects.
Part 5. Comparison Table Among the Three Audio Recorders
Now that you know how to record audio with VLC Media Player, ViWizard Audio Capture, and Audacity, you may wonder which one fits your needs best. The table below highlights their main differences in recording sources, editing features, ease of use, and ideal use cases, helping you quickly choose the right audio recorder.
| Feature | VLC Media Player | ViWizard Audio Capture | Audacity |
|---|---|---|---|
| Best For | Quick audio recording and playback | Recording streaming audio from apps and websites | Advanced audio editing and recording |
| Recording Sources | Microphone, system audio, streams, media files | Music streaming services, browsers, apps, online audio | Microphone, system audio, external devices |
| Audio Editing | ❌ | ✅ (Basic) | ✅ (Powerful) |
| Ease of Use | ⭐⭐⭐⭐ | ⭐⭐⭐⭐⭐ | ⭐⭐⭐ |
| Output Formats | MP3, WAV, etc. (depends on settings) | MP3, FLAC, WAV, AIFF, M4A, M4B | WAV, MP3, FLAC, OGG, etc. |
| Recording Quality | Depends | High-quality with customizable settings | High-quality with manual control |
| Best Use Case | Recording simple clips or extracting audio from videos | Saving online music, podcasts, or streaming audio | Editing and improving recorded audio |
| Price | Free | Paid with trial version | Free |
Part 6. FAQs about Recording Audio with VLC
What format does VLC record audio in?
VLC does not have a fixed audio recording format. The output format depends on the recording settings and the selected conversion profile. By default, VLC usually saves recordings as MP4 files, but you can change the profile to export audio in formats such as MP3, WAV, FLAC, OGG, or other supported formats through the Convert/Save feature. For the best audio quality and compatibility, choose a format based on your needs, such as MP3 for everyday playback or WAV/FLAC for higher-quality audio.
Where Does VLC Save Recorded Audio Files?
By default, VLC saves recorded audio and video files in your user profile's Videos folder on Windows or Movies folder on macOS. To check or change the save location, open VLC and go to Tools > Preferences (or press Ctrl + P), then select the Input / Codecs tab. Under the Files section, find the Record directory or filename option, click Browse to choose a new folder, and select Save to apply the changes.
Yes, VLC Media Player can record audio from a network stream while it is playing. Simply open the stream, go to View > Advanced Controls to enable the recording toolbar, then click the red Record button to start saving the stream locally.
Conclusion
VLC Media Player is a handy choice when you need a free and simple way to record audio. It works well for quick recordings, saving audio clips from media files, or capturing basic input from your microphone. However, because VLC is mainly designed as a media player, its recording features can feel a little limited when you need more control, editing tools, or a smoother way to capture streaming audio.
If you often record online audio, podcasts, or music and want extra features like easier controls and basic editing, tools like ViWizard Audio Capture or Audacity may be worth trying. The best choice depends on what you want to record and how much control you need after recording.
You May Be Interested
How to Record Music from YouTube Using Audacity

6 Ways to Download and Record BBC Sounds

Best Ways to Download iVoox Audio to MP3

How to Record Audio from Firefox in High Quality: The Best Tools and Methods

Download Music from TIDAL for Offline Listening (Mobile & Desktop)

How to Download Audio from TikTok

From new releases to old favorites, Matt Smith is always on the lookout for good music. He follows the latest in digital entertainment and shares songs and media he thinks are worth checking out.

Leave a Comment (0)