Even though Apple has discontinued the iPod Classic, you can still use your iPod as a powerful offline music player. Whether you're using an iPod Nano or an iPod Touch, this guide walks you through everything you need to know.
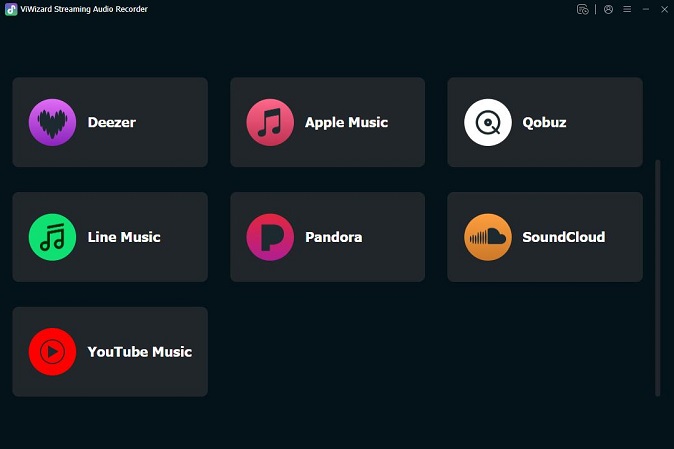
We'll show you how to download music from YouTube to your iPod using ViWizard YouTube Music Converter. With this tool, you can save your favorite YouTube songs, albums, and playlists to your iPod and enjoy them offline anytime.

Part 1. Can You Download Music from YouTube to iPod?
Yes, you can get YouTube Music on an iPod, but it's not as simple as tapping a Download button in the YouTube app. The exact method depends on which iPod model you're using.
- Among all iPod models, only the iPod Touch (7th generation) supports the YouTube Music app. You can install the app, stream music, and download songs for offline listening with a YouTube Music Premium account. However, these downloads stay locked inside the app, and once your subscription expires, the downloaded music is removed automatically.
- For iPod Nano, iPod Shuffle, and iPod Classic, things work differently. These devices don't support internet access or the App Store. To get YouTube Music on these models, you need to convert the audio into a compatible format, such as MP3 or M4A, on your computer and then transfer the files to your iPod.


Why You Need a YouTube to iPod Converter
YouTube Music uses encrypted audio formats, while iPods require standard audio files. To bridge this gap, a dedicated YouTube to iPod converter like ViWizard YouTube Music Converter is required. It allows you to:
- Convert YouTube Music tracks into high-quality MP3 or M4A files
- Transfer the music to your iPod so it appears in your main music library
- Play your favorite tracks offline without Wi-Fi or a paid subscription
Download songs, playlists, albums, and your whole music library from 10 major streaming platforms, including YouTube Music, to MP3, FLAC, WAV, AIFF, M4A, or M4B with original sound quality and full song info and keep your music forever.
Part 2. How to Download Music from YouTube to iPod
Ready to turn this into a reality? To get started, download ViWizard YouTube Music Converter from the provided buttons for your Windows PC or Mac and proceed to install it.
Step 1 Set the Audio Format for iPod Compatibility
Launch ViWizard YouTube Music Converter on your computer. Click the Menu icon in the top-right corner and select Preferences, then switch to the Conversion tab. To ensure you can add YouTube music to iPod without errors, choose MP3 or M4A as the output format. For the best listening experience, set the Bit Rate to 320kbps. Click OK to save these settings.

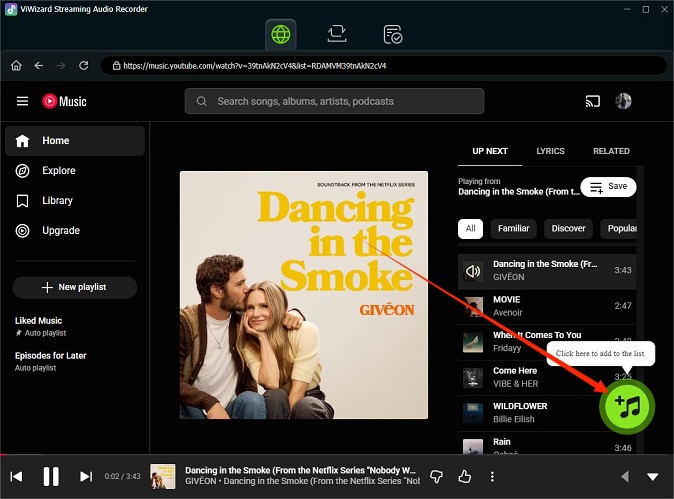
Step 2 Access YouTube Music Within ViWizard
Click the YouTube Music icon in the main interface to launch the built-in web player. You can sign in to your account to quickly find your personal playlists, liked tracks, or albums.
Step 3 Select Songs, Albums, or Playlists
Browse YouTube Music and find the songs you want to put on your iPod. Open a track, album, or playlist, then click the Add (+) button. You can select individual songs or add entire playlists at once, which is helpful if you want to transfer a large music collection to your iPod.
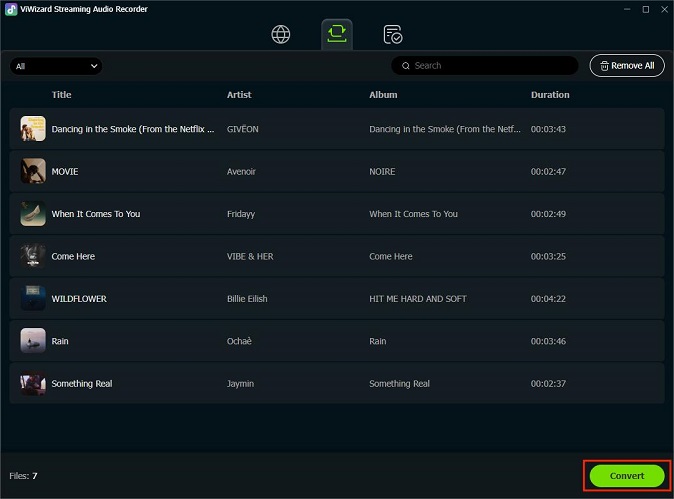
Step 4 Convert and Save YouTube Music Files
Click Convert to start downloading. ViWizard will convert YouTube Music into standard, unencrypted audio files that are fully compatible with iPod devices.
Part 3. How to Add Music from YouTube Music to iPod via Finder/iTunes
After successfully converting your YouTube music for iPod compatibility, the next step is to sync it to your device. Depending on your computer's operating system, follow the appropriate instructions below:
For Mac Users (Using Finder):
On Macs running macOS Catalina or later, iTunes has been replaced by Finder for device management. You do not need to install any additional software. All you need is your Mac, your iPod, and a USB or Lightning cable.
Step 1 Connect your iPod to your Mac. Your device name will appear in the Finder sidebar under Locations.
Step 2 Click your iPod, then select the Music tab in the main window.
Step 3 Ensure the Sync music onto [Your iPod Name] box is checked.
Step 4 You can choose to sync your entire music library or only the YouTube Music tracks you converted using ViWizard.
Step 5 Click Apply in the bottom-right corner. Finder will automatically sync the music to your iPod.

For Windows PC Users (Using iTunes):
On Windows, iTunes is still the main tool for transferring music to an iPod. Some newer systems may also require the Apple Devices app from the Microsoft Store for syncing.
Step 1 Open iTunes and go to File > Add File to Library or Add Folder to Library. Select the converted YouTube music files on your computer.
Step 2 Connect your iPod to your PC using a USB cable. Click the device icon that appears in the top-left corner of iTunes.
Step 3 Select the Music tab from the left sidebar and enable Sync Music.
Step 4 Choose to sync your entire music library or selected playlists, artists, albums, and genres.
Step 5 Select the newly added YouTube tracks and click Apply or Sync. iTunes will copy the music to your iPod.

Tip: How to Download Music from YouTube to iPod Without iTunes
If you want to avoid the limitations of iTunes like library wiping, you can use third-party tools like AnyTrans or iMazing. These tools allow you to transfer music from YouTube Music to iPod by simply dragging and dropping the converted audio files directly into the device's storage.
During the syncing process, the converted YouTube music will be copied to your iPod. Once the process is complete, safely disconnect your iPod. You can now enjoy your favorite YouTube tracks on your iPod whenever you desire, even without an internet connection.
Conclusion
With these steps, you now know how to add music from YouTube to iPod for the ultimate offline listening experience. By using ViWizard YouTube Music Converter, you can easily get YouTube music on iPod Nano, Classic, or Touch without limits. Ready to transfer music from YouTube to iPod? Start your journey today by downloading ViWizard!
You May Be Interested


Matt Smith, a digital entertainment industry enthusiast at ViWizard, is dedicated to providing insightful commentary and solutions for music and media-related topics, including industry trends, analysis, and recommendations.
Leave a Comment (0)