

If you usually buy movies or TV shows from iTunes store, you will find most iTunes movies are in large file size, usually occupy more than 3G storage for each movie. So for iTunes movie lovers, it's necessary to prepare an external driver and move the iTunes library to the external driver to avoid the hard drive is filled to the brim. In this article, we will walk you through how to move and copy your iTunes movies and TV shows to external driver
Part 1. How to Move Your iTunes Library to External Drive
iTunes libraries can get pretty big, especially if you have a lot of music, movies, and other media. Moving your library to an external drive can free up a lot of space on your computer. Additionally, if you get a new computer and want to transfer your library, an external drive makes this process much easier. Keeping your media files on an external drive also ensures they are safe even if something happens to your library (like losing access to music collection after a subscription lapses).
To give just one real-world example: If you have a laptop with limited storage and a massive iTunes library. You notice your laptop is running slow because it's almost out of space. It crashes while gaming and browsing webpages. Moving your iTunes library to an external drive can free up space on your laptop, making it run faster. Then, every time you want to access your iTunes library, just connect the external drive to your laptop, and you can find all your media files there as you normally would. Plus, if you decide to get a new laptop, transferring your iTunes library is much easier.
Step 1Prepare Your iTunes Preferences
- Launch iTunes on your computer.
- Access the Preferences setting on Windows or Mac:
- On Windows: Click 'Edit' in the menu bar at the top, then select 'Preferences'.
- On Mac: Click 'iTunes' in the menu bar at the top, then select 'Preferences'.
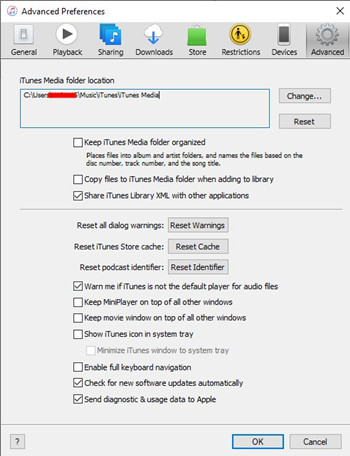
- In the Preferences window, click on the 'Advanced' tab.
- Make sure 'Keep iTunes Media Folder organized' is checked. This ensures all your files are kept in proper folders.
- Make sure 'Copy files to iTunes Media folder when adding to library' is checked. This ensures all files added to iTunes are copied to the iTunes Media folder.
- Click the 'Change' button next to 'iTunes Media folder location'.
- Navigate to your external drive and select or create a folder where you want your iTunes library to be stored.
- Click 'Open' to set this folder as your new iTunes Media folder location.
Step 2Consolidate Your iTunes Library
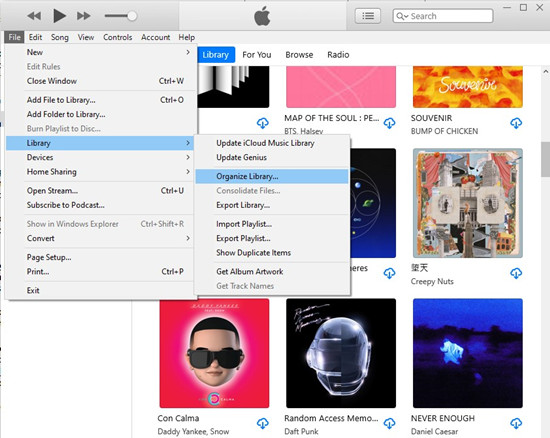
- Click on 'File' in the menu bar.
- Select 'Library', then 'Organize Library'.
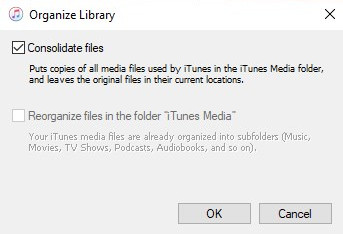
- Check the 'Consolidate files' option. This copies all your media files into the iTunes Media folder in the new location.
- Click 'OK'.
Step 3Move Your iTunes Media Folder to the External Drive
- Make sure iTunes is not running.
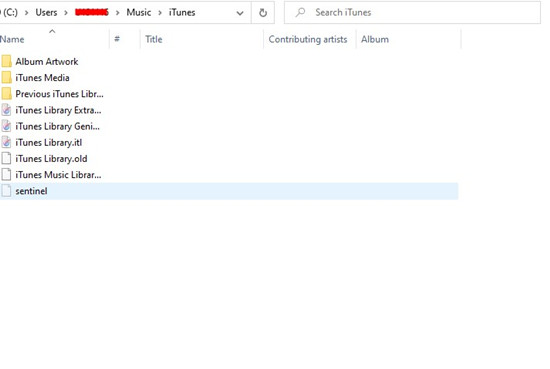
- Navigate to the iTunes Media folder on your computer. The default locations are:
- On Windows:
C:\Users\[Your Username]\Music\iTunes\iTunes Media - On Mac:
/Users/[Your Username]/Music/iTunes/iTunes Media
- On Windows:
- Right-click on the iTunes Media folder and select 'Copy'.
- Open your external drive in File Explorer (Windows) or Finder (Mac).
- Right-click inside the external drive's window and select 'Paste'. This will copy all your media files to the external drive.
Step 4Confirm and Set iTunes to Use the New Location
- Launch iTunes once more.
- Go to 'Preferences' > 'Advanced' and ensure the path next to 'iTunes Media folder location' points to the new folder on your external drive.
- Close and reopen iTunes to ensure it recognizes the new location.
Part 2. How to Save Your iTunes Library to External Drive
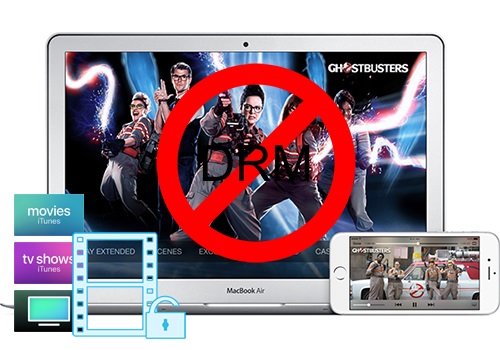
For people who don't like the DRM protection attached to iTunes videos, you are recommended to strip the iTunes DRM protection and save the iTunes videos anywhere you want.
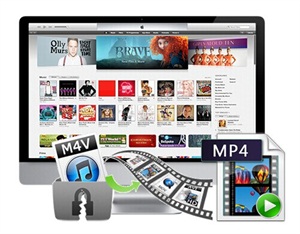
ViWizard M4V Converter is the strongly recommended application to strip the DRM protection from iTunes videos. In the first method we introduced above, there is no change to iTunes files, and they remain encrypted by Fairplay DRM protection. This prevents us from transferring our movies and TV shows to other devices like Android mobile devices and Windows Phones. However, with ViWizard for Mac, we can easily get rid of the DRM protection from iTunes videos and watch them anywhere we like. ViWizard DRM Media Converter for Mac will help us convert iTunes M4V videos to unprotected MP4 format for playing on various mobile devices. It's worth mentioning that ViWizard will retain all metadata of iTunes movies, including audio tracks, subtitles, closed captioning, 5.1 surround, etc.
Key Features of ViWizard M4V Converter
Free Trial Free Trial* Security verified. 5, 481,347 people have downloaded it.
- Convert iTunes movie rentals and purchases to common videos
- Handle the conversion of iTunes M4V videos at 30× faster speed
- Preserve multilingual subtitles, closed captions, chapters, and more
- Support playing iTunes M4V videos anywhere and anytime
Step 1Download and Install ViWizard App on Your Mac
To run ViWizard for Mac successfully on your Mac, please make sure you are running Mac OS X 10.8 or later and have installed the newest iTunes.
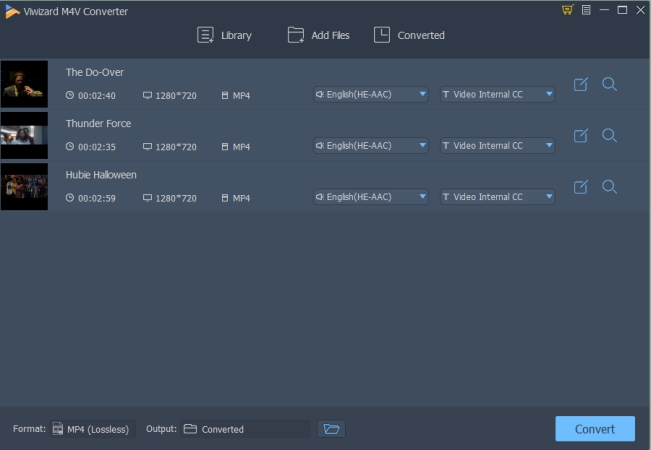
Step 2Import iTunes Videos to ViWizard for Mac
Click the "Add Files" button, then it will find your iTunes library automatically. Choose the videos you want to bypass the DRM from. You can also drag and drop the videos from the iTunes library folder.
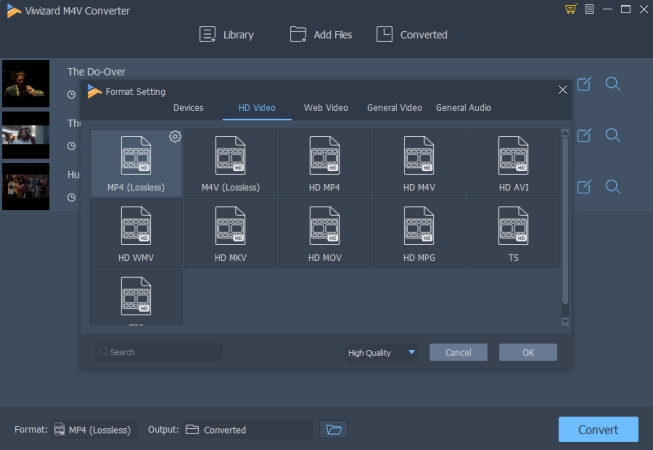
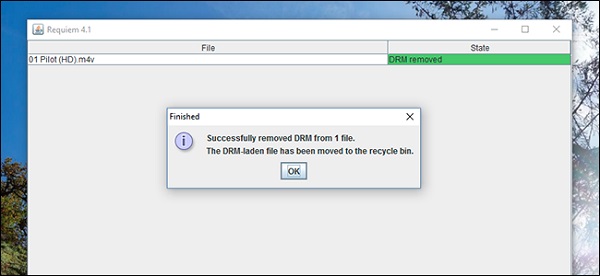
Step 3Remove DRM from iTunes Videos and Convert M4V to MP4
Click the "Convert" button, then ViWizard will start to work. The conversion will be finished soon. Once it's done, you can find the output files under the "Converted" tab or by clicking the "Open" button.

Until now, you have successfully backed up the iTunes videos without quality loss. You can copy the DRM-free iTunes movies to an external drive or anywhere you like. No worry at all about the storage space.
You May Be Interested


Nick Orin is a review writer, software geek and Mac OS enthusiast. He spends all his free time in searching useful software and gadgets to share with others.
Leave a Comment (0)