- Part 1. How to Convert Apple Music to iMovie-Compatible Audio Files

- Part 2. How to Import Converted Apple Music Files into iMovie on Mac
- Part 3. How to Import Converted Apple Music Files into iMovie on iPhone or iPad
- Part 4. How to Add iTunes Purchases or Ripped Music to iMovie
- Pro Tips: Best Practices for Using Music in iMovie Projects

I love working on video projects in iMovie. When it comes to choosing background music, Apple Music seems like the perfect source. It's built into the Apple ecosystem, has a huge library, and offers the right track for any mood. Most importantly, I've already paid for it.
But when I try to add a song in iMovie, Apple Music tracks just won't appear. Even after downloading them and checking my settings, iMovie won't recognize them.
The reason is simple. Apple Music is a streaming service, not a direct source for video editing. Every track is protected by DRM (Digital Rights Management), unless purchased in iTunes as unprotected AAC files, which may cost extra. You can also use ripped iTunes audio, but it's not always the track you want.
Fortunately, there is a solution. By converting Apple Music to unprotected audio files like MP3 that iMovie can recognize, you can use your favorite tracks in just a few steps. With the right approach, your Apple Music library can become a ready-to-use soundtrack, along with tips to use it effectively for the perfect project.
Part 1: How to Convert Apple Music to Compatible Audio Files
Most Apple Music songs are protected by DRM, which is why iMovie cannot see them even if they are fully downloaded. To use Apple Music tracks like regular audio files in iMovie, you need to convert them to MP3, WAV, AAC, AIFF, or other supported formats. Conversion gives you freedom to use any song from your library without buying it again. It takes a little time and requires a conversion tool, but in practice, it is often the easiest way to get your favorite tracks into iMovie.
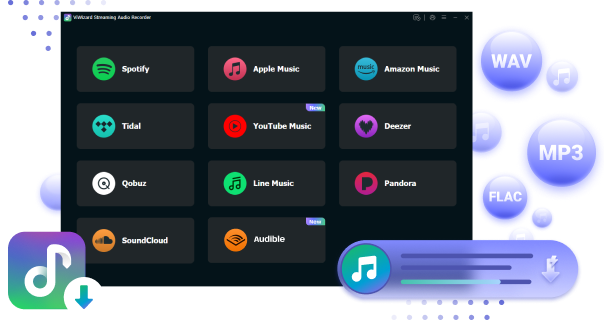
ViWizard Apple Music Converter for Mac connects to your Apple Music library through its built-in web player. You can select tracks, albums, playlists, or your entire library for conversion. You choose a format and start converting. During the process, DRM is removed, original audio quality is preserved, and metadata is embedded for seamless use in iMovie. ViWizard is available for both Windows and Mac, and you can try it for free today.
| File Type | Audio Support |
| iMovie File Import: | AAC, AIFF, BWF, CAF, MP3, MP4, RF64, WAV |
| Audio about Apple Music: | DRM-protected |
| iTunes Purchases: | AAC (unprotected) |
| ViWizard File Output: | AAC, WAV, MP3, M4B, M4A, FLAC |
Key Features of ViWizard Apple Music Converter
Free Trial Free Trial* Security verified. 5, 481,347 people have downloaded it.
- Convert Apple Music songs, albums, playlists, and artists into MP3 for easy access
- Preserve lossless audio, high-resolution lossless, and Dolby Atmos quality
- Strip DRM from Apple Music for unrestricted offline listening
- Save converted audio files while retaining full ID3 tag details
Step 1Install and Set Up ViWizard

Download and install ViWizard Apple Music Converter on your Windows PC or Mac. Open the program and sign in with the same Apple ID you use for Apple Music. This gives the software access to your full library, including playlists, albums, and individual tracks. Once signed in, you're ready to start preparing your music for iMovie.
Step 2Choose the Right Audio Format

Go to the Preferences menu and select a widely supported format like MP3, WAV, or AIFF. These formats work with iMovie and most other media players. You can also adjust the bit rate: higher bit rates improve sound quality but use more storage, while lower bit rates save space.
Step 3Pick Songs, Albums, or Playlists

Browse your Apple Music library inside ViWizard and select the songs, albums, or playlists you want to use in your project. Add them to the conversion queue. This creates DRM-free copies that you can keep permanently, even if you cancel your Apple Music subscription.
Step 4Convert and Save Your Music

Start the conversion. ViWizard will remove DRM and convert your tracks into standard audio files. When the process finishes, open the output folder to find your new files. You can now copy them to an external drive, upload to cloud storage, or move them to any device. Once your songs are saved as MP3, WAV, or AIFF, you can import them into iMovie and use them in your videos without needing an active subscription or internet connection.
Part 2. How to Import Converted Apple Music Files into iMovie on Mac
On a Mac, importing Apple Music converted tracks is simple. ViWizard Apple Music Converter saves the files directly to the Files app, so you can organize them, test options, and reuse them across projects without DRM issues. To add Apple Music to iMovie, you can add music through the Media Browser, Finder, or directly. iMovie treats converted files like regular audio, allowing you to drag them into your timeline and make further adjustments.
Step 1: Add Converted Apple Music to iMovie
Option 1: Drag and Drop
Step 1 Open iMovie and your project, or create a new one.
Step 2 Locate your converted Apple Music files in Finder.
Step 3 Drag the audio files directly into the timeline or the background music section below the timeline.
Option 2: Media Browser
Step 1 In iMovie, click Audio above the browser.

Step 2 Select Music in the sidebar to view your iTunes or Music library.

Step 3 Browse your library and find the converted Apple Music track.
Step 4 Drag the track into the background music section of your timeline.

Option 3: Import Button
Step 1 Click File > Import Media in iMovie.
Step 2 Navigate to the folder containing your converted Apple Music files.
Step 3 Select the files and click Import Selected.
Step 4 Once imported, drag the audio clip into the timeline or background music area.
Step 2: Edit and Adjust Background Music
Step 1 Position your music clip in the timeline where you want it to play.
Step 2 If Trim background music is enabled, iMovie will automatically adjust the track duration to match your movie.
Step 3 Adjust the volume by selecting the clip and using the volume slider above the timeline.
Step 4 To fade the music in or out, click Audio Adjustments (the speaker icon) and select Fade In or Fade Out.
Step 5 Preview your project to ensure the music is timed and balanced correctly.
Step 6 Click Share to export your project once satisfied.
Part 3. How to Import Converted Apple Music Files into iMovie on iPhone or iPad
Converted Apple Music files can also be used on iPhone or iPad. You can add them through the Files app or import them directly into iMovie. They behave like other audio clips, so you can edit videos anywhere without needing Apple Music running.
The main limit is storage, as long tracks or large playlists can take up significant space. Once converted, your favorite Apple Music songs are ready to enhance any iMovie project.
Step 1: Transfer Converted Apple Music Files to iOS
Step 1 Connect your iPhone or iPad to your Mac using a USB cable.
Step 2 Open Finder (MacOS Catalina or later) or iTunes (MacOS Mojave or earlier / Windows).
Step 3 Select your device from the sidebar.
Step 4 Go to the Music tab and ensure Sync Music is enabled.
Step 5 Choose either Entire Music Library or select Selected playlists, artists, albums, and genres to include your converted Apple Music files.
Step 6 Click Apply or Sync to transfer the music to your device.
Step 2: Add Converted Apple Music Files to iMovie on iOS

Step 1 Open the iMovie app on your iPhone or iPad.
Step 2 Open an existing project or create a new movie project.
Step 3 Tap Add Media (+) > Audio > My Music.

Step 4 Browse and select the music files you synced from your Mac.
Step 5 Tap the track to add it to the timeline or background music area.
Step 3: Edit Music in iMovie on iOS
Step 1 Tap the music clip in the timeline to show editing controls.
Step 2 Adjust the duration by tapping and holding the clip edges, then dragging to the desired length.
Step 3 Modify the volume by selecting the clip and using the volume slider.
Step 4 Add additional audio or sound effects by tapping Add > Audio and choosing other clips.
Step 5 When finished, tap Share to save or export your movie.
Part 4. How to Add iTunes Purchases or Ripped Music to iMovie
The official way to add music to iMovie without conversion is by using purchased songs from the iTunes Store or ripped CDs. iTunes purchases are DRM-free 256Kbps AAC files, and ripped audio can be saved as MP3, AAC, ALAC, or WAV. All of these are supported in iMovie except ALAC.
Adding iTunes purchases or ripped music involves a few steps: buying or ripping tracks, checking formats, uploading to iCloud, and integrating them into iMovie. The main limitation is selection: some tracks may only be available on Apple Music. Older ripped files may need format adjustments, and purchases must be fully downloaded.
Apple advises you to have permission to use music in videos, so check rights if you plan to share your work publicly. That said, purchasing music from iTunes is not always necessary for personal projects. For a simpler solution, ViWizard Apple Music Converter lets you convert Apple Music tracks into MP3 and other formats without extra purchases. If you've felt limited by Apple Music restrictions, ViWizard Apple Music Converter is a practical tool worth trying.
A full-featured Apple Music converter that easily converts Apple Music songs, albums, playlists—including iCloud Music Library content, personalized recommendations, and curated playlists—into MP3, M4A, M4B, WAV, AIFF, and FLAC so you can keep your Apple Music forever or transfer it to any device without restrictions.
Option 1: Using iTunes or Apple Music Purchases
Step 1 Open iTunes (macOS Mojave or earlier) or the Music app (macOS Catalina or later).
Step 2 Go to your library and find the song you want to use.
Step 3 Right-click or Control-click the song and choose Song Info.
Step 4 Click the File tab and check the Kind field. Make sure it says AAC audio file and not Protected AAC audio file.

Step 5 If a cloud icon appears next to the song, click it to download the song to your computer.
Step 6 Open your iMovie project or create a new one.
Step 7 Click the Audio tab at the top left of the window.
Step 8 In the sidebar, select Music or iTunes on older macOS versions.
Step 9 Find your downloaded, DRM-free song and drag it into the timeline or background music section.
Step 10 If the song does not appear, drag it from iTunes or the Music app to your desktop, then drag it from the desktop into iMovie.
Step 11 Move the track to the position you want in the timeline.
Step 12 Trim the track by dragging the edges to match your movie.
Step 13 Adjust the volume with the volume slider above the timeline.
Step 14 Click Audio Adjustments to add Fade In or Fade Out if needed.
Step 15 Play your project to make sure the audio is timed correctly and sounds right.
Option 2: Using Ripped Music from CDs or Other Sources
Step 1 Open iTunes or the Music app.
Step 2 Click File > Import and select your ripped music files or folder.
Step 3 Check that the files appear in your library and can play.
Step 4 Open your iMovie project or create a new one.
Step 5 Click the Audio tab at the top left of the window.
Step 6 In the sidebar, select Music.
Step 7 Find your ripped music file in the library.
Step 8 Drag the file into the timeline or background music section.
Step 9 Move the track to the place you want it to play.
Step 10 Trim the clip by dragging the edges to fit your movie.
Step 11 Adjust the volume with the volume slider.
Step 12 Click Audio Adjustments to add Fade In or Fade Out if desired.
Step 13 Play your project to make sure the audio fits well with your movie.
Pro Tips: Best Practices for Using Music in iMovie Projects
Using Apple Music in iMovie can make your videos more engaging, but a few simple practices make the process easier.
Built-in Music and Sound Effects
iMovie comes with some music tracks and sound effects, though the selection is limited on Mac. On iPhone and iPad, there are more royalty-free options, which makes browsing easier. For more variety, you can use Apple's free music libraries or other royalty-free sources and import them manually. Built-in tracks are generally safe for public uploads, but popular songs from other sources can trigger copyright claims.
Importing Your Own Music
Adding your own audio files is simple. Drag an MP3, WAV, or AIFF into the timeline, or import it through the Media Browser. This is usually faster than searching through iMovie's built-in music list. Sometimes a track doesn't appear right away. Restarting iMovie or the Music app usually fixes this.
Streaming Music Won't Work
Songs from subscription services like Apple Music or Spotify won't appear in iMovie because they are protected by DRM. This is normal, not a bug. You might see a song in your library, but it won't show up in iMovie. There are workarounds, like converting the audio to MP3 or using other sources, but these can violate service rules.
Editing Music in Your Project
iMovie automatically places and stretches background music, but it may not match exactly where you want it. A trick is to tap the music track in the timeline and split it where needed. Then you can move, trim, or adjust each piece. It takes a few extra taps, but it gives full control over how the music fits your video.
Syncing Music to Video
If you want music to change at specific points, like a different song at the end or a sound effect in the middle, you need to split and trim the audio manually. iMovie loops tracks by default, so adjusting placement ensures your video feels polished.
Conclusion
iMovie is the most convenient and useful video editor for Mac and iPhone users while Apple Music is one of the best music services ever. And ViWizard Apple Music Converter is the one who can help you take better advantages of both of them. Have a try of ViWizard Apple Music Converter and you'll find it out.
You May Be Interested


Adam Gorden, the digital media specialist at ViWizard, is dedicated to providing the best solutions for digital media management, including audio and video conversion, file optimization, and media workflow enhancements.
Leave a Comment (0)