- Way 1: Transfer iTunes or Apple Music Playlists to Spotify with ViWizard Apple Music Converter

- Way 2: Transfer Apple Music Playlists to Spotify Using ViWizard Music Playlist Transfer
- Way 3: Transfer Apple Music Playlists to Spotify with TuneMyMusic
- Way 4: Transfer Apple Music Playlists to Spotify Using SongShift
- Way 5: Transfer Apple Music Playlists to Spotify with Soundiiz
- Way 6: Transfer Apple Music Playlists to Spotify Using FreeYourMusic
- Way 7: Transfer Apple Music Playlists to Spotify Using Playlistor.io
- Way 8: Transfer iTunes or Apple Music Playlists to Spotify Manually
- Pro Tip: Compare the Best Apple Music to Spotify Playlist Converters

To be honest, as an Apple Music user—a not-so-loyal one—I was starting to consider Spotify. They're the two biggest names in music streaming. And now, with similar subscription prices and features, the race between them is closer than ever. Depending on how you listen, one is bound to suit you better. I know Apple's lossless audio and spatial sound is still appealing, but it's no longer the reason to stay with Apple Music—and Spotify might just offer more.
The tricky part comes when you decide to switch. You have playlists on Apple Music, but your playlists do not come with you if you move completely. Apple Music even removes your playlists and library when your subscription ends, so transferring them is necessary.
Luckily, Spotify now offers a mobile "import your music" option powered by TuneMyMusic, allowing you bring entire playlists from Apple Music into your Spotify library easily. Other tools, such as ViWizard Apple Music to Spotify Converter and ViWizard Music Playlist Transfer, can help with different transfer needs. Moving your Apple Music library to Spotify only takes a few minutes.
Way 1: Transfer iTunes or Apple Music Playlists to Spotify with ViWizard Apple Music Converter

ViWizard Apple Music to Spotify Converter:
- Platforms: Windows, macOS
- Pricing: Paid (~$20/month, ~$50/year, ~$90 lifetime)
- Free Trial: √
- Core Functions: Converts Apple Music/iTunes songs to MP3, FLAC, WAV
- Best for: Users who want actual music files to use anywhere
A popular way to move music from Apple Music to Spotify is using ViWizard Apple Music Converter. This tool works differently from most playlist movers because it downloads and converts Apple Music or iTunes tracks into common audio files like MP3 or FLAC. Once the songs are DRM-free, they can be uploaded to Spotify using the Local Files feature, and playlists can be rebuilt while keeping song titles, album art, and metadata intact. ViWizard offers a free trial, and the full version is available through a one-time purchase or subscription.
A key benefit is that ViWizard not only transfers playlists but also removes DRM. This makes it possible to listen anywhere and create a full backup of an Apple Music library, including songs, albums, artists, and playlists on a computer. Conversion can take time for large libraries, but it gives complete control over files and ensures nothing is lost. Converting one playlist at a time keeps the process smooth and manageable.
Key Features of ViWizard Apple Music Converter
Free Trial Free Trial* Security verified. 5, 481,347 people have downloaded it.
- Convert Apple Music songs, albums, playlists, and artists into MP3 for easy access
- Preserve lossless audio, high-resolution lossless, and Dolby Atmos quality
- Strip DRM from Apple Music for unrestricted offline listening
- Save converted audio files while retaining full ID3 tag details
Step 1 Download and install ViWizard Apple Music Converter from the official website on your Windows or Mac computer.
Step 2 Open ViWizard and log in to your Apple Music account using the built-in Apple Music web player.

Step 3 Click Menu > Preferences > Convert and set MP3 as the output format. Adjust bit rate and sample rate if needed.

Step 4 Go to Library and browse your Apple Music playlists, albums, or songs. Click the + button next to the tracks you want to convert.

Step 5 Click the Convert button on the top right to start downloading your Apple Music tracks as DRM-free audio files.

Step 6 Click the History icon or open the output folder to locate your converted songs.

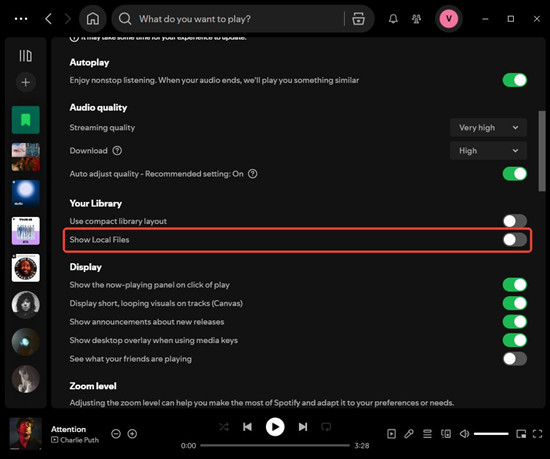
Step 7 Open the Spotify Desktop App and go to Settings > Local Files. Toggle on Show Local Files.
Step 8 Click Add a source, select the folder with your converted songs, and click OK.

Step 9 Go to Your Library > Local Files to see your music.

Step 10 To create playlists, hold Ctrl (Windows) or Command (Mac) while selecting songs, then drag them into a new playlist.

Way 2: Transfer Apple Music Playlists to Spotify Using ViWizard Music Playlist Transfer
ViWizard Apple Music to Spotify Transfer:
- Platforms: Windows, macOS
- Pricing: Paid (~$10/month, ~$25/year, ~$60 lifetime)
- Free Trial: √
- Core Functions: Transfers playlists, albums, and tracks between Apple Music and Spotify
- Best for: Desktop users moving many playlists at once
ViWizard Music Playlist Transfer moves playlists directly between Apple Music and Spotify. After connecting both accounts, playlists, albums, or special collections like Favorite Songs can be selected and transferred immediately. Playlist order, album art, and song details are maintained wherever possible. A free trial allows up to 100 tracks, while a subscription unlocks unlimited transfers. This method is faster than manually recreating playlists and avoids the need to handle audio files.
Key Features of ViWizard Music Playlist Transfer
Free Trial Free Trial* Security verified. 5, 481,347 people have downloaded it.
- Transfer unlimited playlists, albums, artists, and tracks across platforms
- Preserve track details and album artwork during transfer
- Recreate your music library on any supported streaming service
- Works smoothly with Spotify, Apple Music, TIDAL, Deezer and more
Step 1 Download and install ViWizard Music Playlist Transfer on your computer, then open the program.
Step 2 On the main screen, select Apple Music as the source platform and log in with your Apple ID. Authorize access if prompted.

Step 3 Select Spotify as the destination platform and log in with your Spotify account.
Step 4 Click Next to see your Apple Music playlists, albums, and artists.
Step 5 Check the boxes next to the items you want to transfer.

Step 6 Click Start Transfer at the bottom and wait until the process completes.

Step 7 Open the Spotify App, go to Library > Playlists, and confirm that your playlists are there.
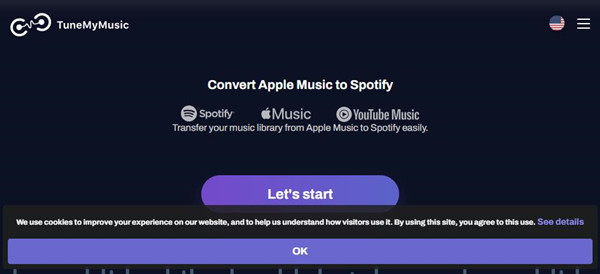
Way 3: Transfer Apple Music Playlists to Spotify with TuneMyMusic
TuneMyMusic Apple Music to Spotify Converter:
- Platforms: Web (any browser)
- Pricing: Free limited version; Premium ~$5.50/month
- Free Trial: √
- Core Functions: Transfers playlists online between Apple Music and Spotify
- Best for: Quick transfers without installing apps
TuneMyMusic can be accessed through Spotify's built-in Import Your Music feature or its own website. Playlists are transferred directly and feed into Spotify's recommendation system, supporting mixes like Daily Mix. The free version handles small transfers, while a paid subscription removes limits and allows automatic syncing. Transfers happen across platforms without installing software, though large playlists may occasionally have missing tracks due to differences in music catalogs.
Step 1 Open the Spotify mobile app and go to Your Library.
Step 2 Scroll to the bottom and tap Import your music.
Step 3 Select TuneMyMusic from the list of supported services.
Step 4 Authenticate your Apple Music account when prompted.
Step 5 Choose Apple Music as the source platform.
Step 6 Select the playlists you want to import.
Step 7 Confirm the transfer, and wait for TuneMyMusic to copy the playlists into your Spotify library.
Step 8 Open Spotify > Playlists to view your imported playlists.
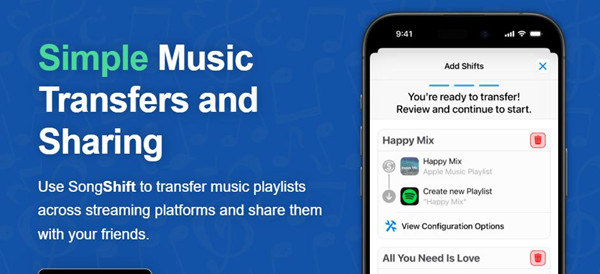
Way 4: Transfer Apple Music Playlists to Spotify Using SongShift
SongShift Apple Music to Spotify Converter:
- Platforms: iOS (iPhone/iPad)
- Pricing: Free limited version; Pro ~$7/month, ~$30/year
- Free Trial: √
- Core Functions: Transfers and syncs playlists on mobile
- Best for: iPhone users moving playlists on the go
SongShift is an iOS app for easy playlist transfers. After connecting Apple Music and Spotify, selected playlists are matched automatically. The free version allows a few transfers, and a premium subscription unlocks unlimited transfers, batch processing, and automatic syncing. Transfers are straightforward and convenient for mobile-only use, though track mismatches can occur occasionally.
Step 1 Install SongShift from the App Store and open the app.
Step 2 Connect your Apple Music account and Spotify account by following the on-screen prompts.
Step 3 Tap the + icon to create a new shift.
Step 4 Select the Apple Music playlists you want to transfer.
Step 5 SongShift will attempt to match songs to Spotify's catalog. Review any mismatches and fix them if necessary.
Step 6 Tap Confirm to start transferring the playlists.
Step 7 Open the Spotify App and check Library > Playlists for your new playlists.
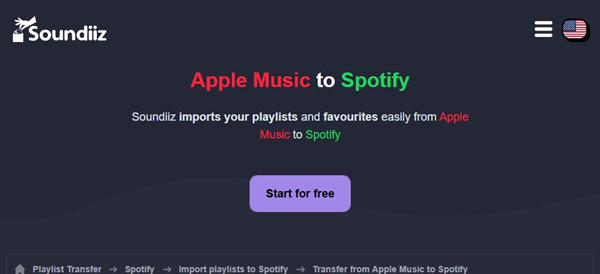
Way 5: Transfer Apple Music Playlists to Spotify with Soundiiz
Soundiiz Apple Music to Spotify Converter:
- Platforms: Web, Android
- Pricing: Free limited version; Premium ~$3.25/month; Creator ~$6.25/month
- Free Trial: √
- Core Functions: Transfers playlists, albums, tracks; can sync
- Best for: Users with many playlists or multiple music services
Soundiiz works across multiple streaming platforms and can transfer playlists, albums, or entire libraries. The free plan handles small or occasional transfers, while the premium plan allows unlimited moves, playlist synchronization, and exporting in multiple formats. Missing tracks are reported clearly, making it useful for complex or large libraries. The subscription cost is higher than simpler tools, but it is well suited for managing multiple streaming accounts efficiently.
Step 1 Open Soundiiz in a web browser and log in or create an account.
Step 2 Click Platform to Platform, then select Apple Music and log in to link your account.
Step 3 Select Spotify as the destination and log in.
Step 4 Choose the playlists you want to transfer.
Step 5 For Apple Music playlists, click More > Share Playlist > Copy Link. For iTunes playlists, go to File > Library > Export Playlist and save as a .txt file.

Step 6 Paste the Apple Music playlist link or upload the .txt file in Soundiiz.
Step 7 Click Convert and wait for the transfer to complete.

Step 8 Open Spotify > Library > Playlists to check your imported playlists.
Way 6: Transfer Apple Music Playlists to Spotify Using FreeYourMusic

FreeYourMusic Apple Music to Spotify Converter:
- Platforms: Windows, Mac, Linux, iOS, Android
- Pricing: Free limited version; Premium ~$5/month quarterly or ~$3/month yearly; ~$200 lifetime
- Free Trial: √
- Core Functions: Transfers playlists, albums, tracks; auto-sync and cloud backup
- Best for: Users switching music apps often
FreeYourMusic is a cross-platform tool for moving playlists. The free version allows small transfers, while a paid subscription or one-time purchase unlocks unlimited transfers, automatic syncing, and support for multiple platforms. Transfers are fast, clean, and easy to manage, though syncing may require occasional checks to maintain consistency between accounts.
Step 1 Download and install FreeYourMusic on your device (Windows, Mac, Android, or iOS).
Step 2 Open the app and select Apple Music as the source platform. Log in with your Apple ID.
Step 3 Select Spotify as the destination platform and log in.
Step 4 Choose the playlists you want to transfer by checking the boxes next to them.
Step 5 Tap Start to begin the transfer process.
Step 6 Open the Spotify App and go to Library > Playlists to confirm your playlists are there.
Way 7: Transfer Apple Music Playlists to Spotify Using Playlistor.io

Playlistor.io Apple Music to Spotify Converter:
- Platforms: Web (any browser)
- Pricing: Free
- Core Functions: Converts playlists by pasting Apple Music links to Spotify
- Best for: Quick, one-time transfers
Playlistor.io is a simple web-based tool. By pasting Apple Music playlist links and selecting Spotify as the destination, playlists can be transferred quickly without installing software. The tool is suitable for one-off transfers, though smaller playlist limits and basic track matching make it less practical for very large libraries.
Step 1 Open Playlistor.io in a web browser.
Step 2 Click Connect Apple Music and log in to your Apple Music account.
Step 3 Click Connect Spotify and log in to your Spotify account.
Step 4 Choose the Apple Music playlists you want to transfer.
Step 5 Click Transfer and wait for the process to complete.
Step 6 Open Spotify > Library > Playlists to view the transferred playlists.
Way 8: Transfer iTunes or Apple Music Playlists to Spotify Manually
Manual Transfer:
- Platforms: Any device with Spotify
- Pricing: Free
- Core Functions: Search and add songs manually in Spotify
- Best for: Small playlists or users who don't want extra tools
Finally, you can move playlists manually by recreating them in Spotify. It takes more time because each song must be found and added individually, but Spotify's search and recommendations make this easier. This method works best for small playlists or when you want to ensure every song is correct. Users note that it is manageable for libraries under 100 tracks, while larger collections are better served by automated tools like ViWizard Music Playlist Transfer.
Step 1 Open the iTunes or Apple Music app on your computer.
Step 2 Go to Library > Playlists and select the playlist you want to transfer.

Step 3 Take note of all song titles or take a screenshot for reference.
Step 4 Open the Spotify App and go to Playlists > Create Playlist. Name it the same as your Apple Music playlist.
Step 5 Click into the new playlist and use the Search bar to find each song.

Step 6 Click Add next to each track to include it in the playlist.

Step 7 Optionally, scroll to the Recommended Songs section and click Add to include similar tracks.

Bonus: How to Keep Your Playlists Synced Across Different Music Services
If you use multiple streaming services like Apple Music and Spotify, ViWizard Streaming Audio Recorder is a handy tool to keep your favorite songs safe. It works with nine popular services, including Apple Music, Spotify, and more, letting you save songs from all of them easily.
ViWizard exports your music as regular audio files that you truly own. This means you don't have to worry about losing playlists or subscriptions ending. Once saved, your songs are yours to keep forever. To use it, simply find your tracks on any supported service while running ViWizard. It captures the songs with all their details—like artist and album info—intact. You can then listen anytime, on any device, without needing to sign into each streaming app.
It's a simple way to build a personal music library that stays with you, no matter which services you use.
A versatile all-in-one streaming music recorder to extract songs, albums, playlists, and exclusive content from Spotify, Apple Music, Amazon Music, Tidal, Deezer, Pandora, SoundCloud, Qobuz, LINE MUSIC and YouTube Music into popular formats like MP3 - with support for original sound quality, fast batch conversion, and built-in music management to help you save, organize, and enjoy your favorite tracks anytime, anywhere.
Pro Tip: Compare the Best Apple Music to Spotify Playlist Converters
| Tool / Method | Platforms | Free / Trial | Pricing (approx) | Core Transfer Function | Best For |
| ViWizard Apple Music Converter | Windows, macOS | Yes (trial) | Paid (~$15/mo, ~$45/yr, ~$90 lifetime) | Converts Apple Music/iTunes songs to MP3, WAV, FLAC | Users who want actual song files |
| ViWizard Music Playlist Transfer | Windows, macOS | Yes (trial) | Paid (~$10/mo, ~$25/yr, ~$60 lifetime) | Moves playlists, albums, and tracks between services | Desktop playlist transfers |
| TuneMyMusic | Web (any browser) | Yes (free tier) | Free limited; Premium ~$2/mo | Transfers playlists online | Quick online transfers |
| SongShift | iOS (iPhone/iPad) | Yes | Free + Pro ~$7/mo | Transfers & syncs playlists on mobile | iPhone/iPad users |
| Soundiiz | Web, Android | Yes (free limited) | Free limited; Premium ~$3‑$5/mo | Transfers playlists + additional tools | Large/multiple playlists |
| FreeYourMusic | Windows, Mac, Linux, iOS, Android | Yes (free limited) | Free limited; Premium ~$3/mo or ~$200 lifetime | Transfers playlists with auto‑sync & cloud backup | Frequent music app switchers |
| Playlistor.io | Web (any browser) | Yes (free) | Free | Converts playlists by pasting links | Simple one‑off transfers |
| Manual Transfer | Any Spotify device | Free | Free | Manually recreate playlists in Spotify | Small playlists / no tools |
Conclusion:
As the Apple Music completes its music services with a perfect combination of local music collections and Apple Music catalog, it's hard for those have a vast personal music collection in iTunes to transfer different types of playlists to other platforms such as Spotify. But with ViWizard, not only you can transfer your iTunes playlists to Spotify successfully, you also have the access to them as local files for offline play. In addition to iTunes playlists, other Apple Music contents can be downloaded and transferred to Spotify with ViWizard. Download ViWizard.
You May Be Interested


Adam Gorden, the digital media specialist at ViWizard, is dedicated to providing the best solutions for digital media management, including audio and video conversion, file optimization, and media workflow enhancements.
Leave a Comment (0)