



With so many streaming services available today, listening to music from around the world has become easier than ever. However, Spotify and YouTube Music offer different ways to build and manage your music collection. Spotify focuses on personalized playlists and music discovery, while YouTube Music combines official releases with the wide range of music content available on YouTube, including live performances and covers.
Because each platform has its own catalog and features, many people use both Spotify and YouTube Music. While this provides access to more music, managing playlists and favorite tracks across different accounts can become inconvenient when switching platforms or combining collections.
If you want to move Spotify playlists to YouTube Music or manage your music across both services, this guide covers playlist transfer tools like TuneMyMusic, Soundiiz, and FreeYourMusic, along with music converters and local file uploads. It also explains how to move YouTube Music songs to Spotify so you can choose the best way to organize your personal music library.
Part 1. How to Transfer Spotify Playlists to YouTube Music with Playlist Transfer Tools
If you want to move Spotify playlists without rebuilding everything manually, playlist transfer tools are the easiest option. These services connect Spotify and YouTube Music, use information such as song titles, artists, and albums, and recreate playlists with matching tracks on YouTube Music. This works well for most popular songs, though some tracks may not transfer if they are unavailable or listed differently between platforms.
TuneMyMusic, Soundiiz, and FreeYourMusic are popular options for this type of transfer. They work in similar ways while offering different features for managing playlists, supporting multiple services, and organizing music collections.
#1Transfer Spotify Playlists to YouTube Music with TuneMyMusic
TuneMyMusic is a web-based tool for moving playlists between streaming services. After connecting Spotify and YouTube Music, it scans playlist information and recreates playlists on YouTube Music. It also supports transfers between other platforms and provides playlist backup options.
01Open the TuneMyMusic website and click Let's Start to begin the transfer.
02Select Spotify as the source platform.
03Sign in to your Spotify account and allow TuneMyMusic to access your playlists and music data.
04Select the Spotify playlists you want to transfer.
05Choose YouTube Music as the destination service.
06Sign in with your Google account and allow TuneMyMusic to create playlists in your YouTube Music library.
07Start the transfer and wait for TuneMyMusic to match your Spotify tracks with songs on YouTube Music.
08Check the transfer results and review any tracks that could not be matched.
#2Transfer Spotify Playlists to YouTube Music with Soundiiz
Soundiiz works as a broader playlist management tool across multiple music services. Besides transferring playlists, it helps organize, merge, and manage music collections. When moving Spotify playlists to YouTube Music, Soundiiz compares track information and identifies songs that cannot be matched.
01Open the Soundiiz website and sign in to your account.
02Select Transfer from the Tools menu.
03Connect Spotify as the source service and allow access to your account.
04Connect YouTube Music as the destination service and sign in with your Google account.
05Select Playlists as the content type you want to transfer.
06Choose the Spotify playlists you want to move.
07Review your selected playlists and confirm the transfer.
08Wait for Soundiiz to recreate your playlists on YouTube Music.
09Check the transfer report to see matched songs and unavailable tracks.
#3Transfer Spotify Playlists to YouTube Music with FreeYourMusic
FreeYourMusic is an app-based option available on desktop and mobile devices. It helps transfer playlists and music collections between supported platforms while keeping the original playlist structure. It is useful for managing music across different devices and services.
01Install and open the FreeYourMusic app on your desktop or mobile device.
02Select Spotify as the source service.
03Sign in to Spotify and connect your account.
04Select YouTube Music as the destination service.
05Sign in with your Google account and allow access.
06Select the Spotify playlists you want to transfer.
07Start the transfer and wait for FreeYourMusic to match and recreate your playlists.
08Open YouTube Music and check the transferred playlists.
Part 2. How to Transfer between Spotify Music and YouTube Music with a Music Converter
If playlist transfer is not enough and you want to keep the actual music files, a music converter provides another option. Instead of matching songs between streaming catalogs, it converts Spotify songs into common audio formats that can be saved locally.
ViWizard Streaming Audio Recorder is an all-in-one toolkit that helps convert music from 10+ services, including Spotify and SoundCloud, into formats such as MP3, WAV, FLAC, AIFF, M4A, or M4B.
Unlike playlist transfer tools, a converter like ViWizard Streaming Audio Recorder keeps the audio files themselves for personal use, such as playing them with compatible apps, devices, or personal music libraries, instead of only transferring playlist information. Once saved locally, these files can be organized and uploaded to supported platforms. This approach can be useful when songs are unavailable on YouTube Music, when you want a backup library, or when you prefer more control over your collection.
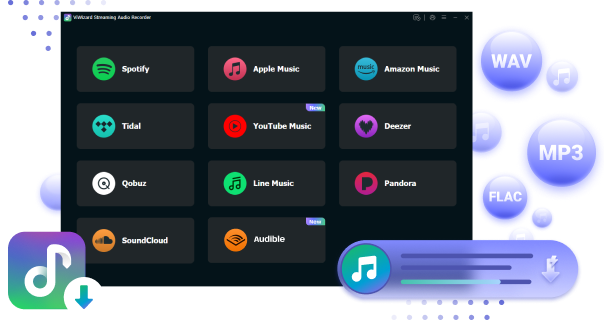
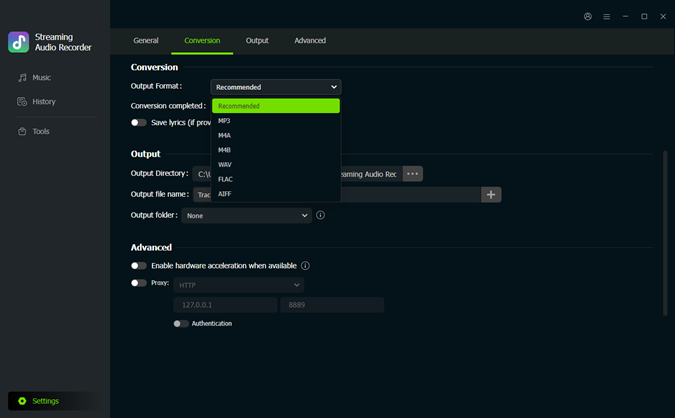 Step 1: Choose MP3 as the Output Format
After installing and opening ViWizard Streaming Audio Recorder, click Settings at the lower left and open General. In the Music settings, select MP3 as the output format. You can also adjust audio settings such as bit rate, sample rate, codec, and channels. Click OK to save your changes.
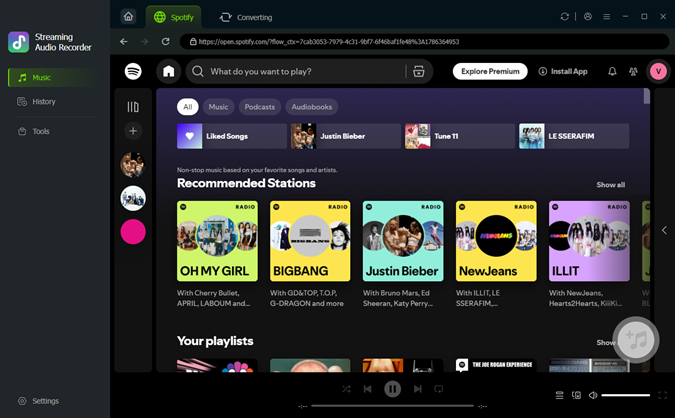 Step 2: Open the Built-in Spotify Web Player
Go back to the main interface and launch the built-in Spotify web player. Sign in with your Spotify account to access your music library, including saved songs, albums, and playlists.
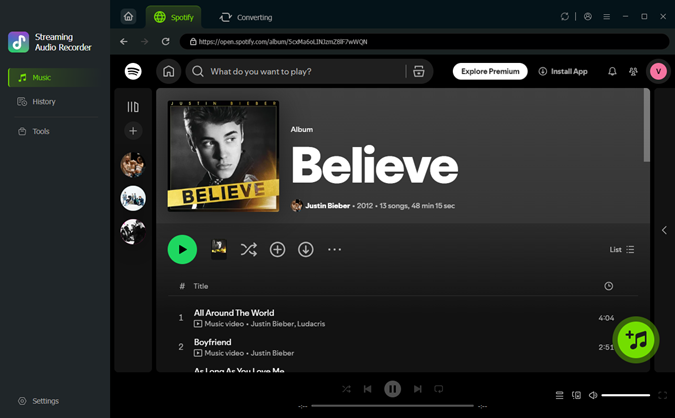 Step 3: Select Spotify Music to Convert
Browse your Spotify library or use the search bar to find the songs, albums, or playlists you want to upload to YouTube Music. Once you have selected the music, click Add to List to load it into the conversion panel.
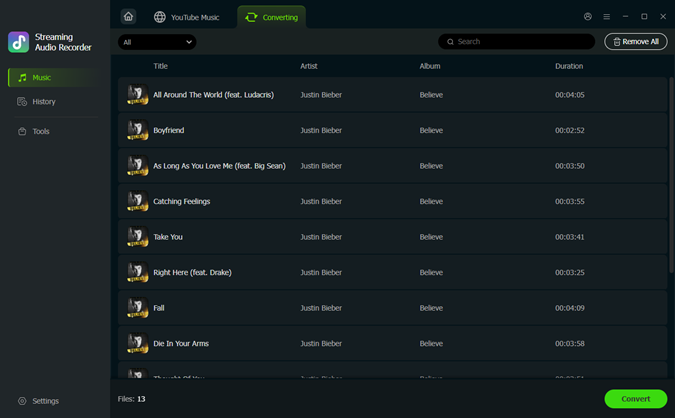 Step 4: Convert and Save Spotify Music as MP3
Click Convert to start processing the selected Spotify music. When the conversion is complete, the tracks will be saved as MP3 files on your computer. You can then find the converted files in the output folder and upload them to YouTube Music.
Part 3. How to Upload Spotify Songs to YouTube Music as Local Files
YouTube Music supports personal music uploads, allowing you to add local audio files to your library. This feature is designed for music already stored on your computer, such as purchased songs, personal recordings, or converted files.
Instead of matching songs from YouTube Music's catalog, this method uploads your own files directly. It can be useful for rare tracks, unavailable songs, or personal collections that you want to access through YouTube Music. Uploaded music remains part of your personal library and does not become part of YouTube Music's official streaming catalog.
01Prepare Spotify songs as compatible audio files saved on your computer.
02Open YouTube Music in a desktop browser and sign in to your Google account.
03Click your profile picture in the top-right corner.
04Select Upload music from the menu.
05Choose the audio files you want to upload.
06Wait for the upload process to complete.
07Open Library > Songs > Uploads to find your uploaded music.

Part 4. How to Upload YouTube Music Songs to Spotify as Local Files
Moving music from YouTube Music to Spotify also requires a local file approach. Spotify's Local Files feature allows you to add music stored on your device and play it through Spotify. This works well for personal recordings, purchased downloads, converted files, or tracks unavailable in Spotify's catalog.
Compared with playlist transfers, local file uploads focus on maintaining your own music collection. They provide more flexibility because the same files can be organized and used across different platforms.
01Save your music files on your computer or device in a Spotify-supported format.
02Open the Spotify desktop app and click your profile picture.
03Select Settings from the menu.
04Scroll down to the Library section.
05Turn on Show Local Files.

06Select the folders where your music files are stored.
07Open Your Library > Local Files to view your tracks.

08Create a playlist with your local files and play them through Spotify.
Read More: How to Transfer YouTube Music Playlist to Spotify (3 Easy Ways)
Part 5. Key Takeaways
Together, these methods cover the main ways to move between Spotify and YouTube Music. Playlist transfer tools are the quickest option for recreating playlists, while music converters and local file uploads provide more control over your personal music collection.
For users who want to keep and manage their own audio files, ViWizard Streaming Audio Recorder offers a flexible way to save music from Spotify and other streaming services as MP3, WAV, FLAC, AIFF, M4A, or M4B files. These files can be organized, backed up, or uploaded to supported platforms like YouTube Music as local files.
The best method depends on your needs, whether you want to preserve playlists, keep audio files, or build a music library across multiple platforms. Since Spotify and YouTube Music have different catalogs, some songs may not transfer perfectly. Checking unavailable tracks after the transfer can help keep your new library complete.
You May Be Interested


Adam Gorden, the digital media specialist at ViWizard, is dedicated to providing the best solutions for digital media management, including audio and video conversion, file optimization, and media workflow enhancements.

Leave a Comment (0)