Want to make your Google Slides more engaging and memorable? Adding background music can do just that. In this guide, you'll learn exactly how to add music from YouTube to Google Slides using two simple yet effective methods: downloading YouTube music and uploading it to Google Drive for offline playback, and embedding a direct YouTube Music link into your slides.

Whether you're preparing a business presentation, a school project, or a personal slideshow, these tips will help you enhance your content with ease.
Can You Add Music from YouTube to Google Slides?
Yes, but not directly. Google Slides lets you add YouTube content, but it doesn't have a dedicated "Add YouTube Music" button. There are two easy ways to put YouTube music in your slides:
- Method 1: Download the YouTube music and upload it to Google Drive. This gives you full control over playback. You can set autoplay, loop the music, and keep it playing smoothly across all slides without interruptions.
- Methood 2: Embed a YouTube video link. This is quicker and simpler, but it needs an internet connection. The music might pause or skip when you switch slides.
For presentations or public speaking, we recommend the first method. It ensures your background music plays smoothly from start to finish and is very easy to set up.
Method 1: Download YouTube Music and Add to Google Slides
Adding YouTube music links directly to Google Slides can be tricky. It requires an internet connection during your presentation, and streaming can sometimes pause or buffer. By downloading YouTube music as MP3 and uploading it to Google Drive, you get several advantages:
- ✅Offline playback: Your tunes will still play without internet, making it great for classrooms, meetings, or conferences.
- ✅Autoplay or click-to-start: You get to decide when the music kicks in, automatically at the start or when you click a button.
- ✅Smooth playback across slides: Loop or extend your music without it stopping when you switch slides.
- ✅Permanent access: Once in Google Drive, your music is always available.
- ✅Better presentation control: No buffering, ads, or interruptions like when streaming from YouTube.
Tool Requried: ViWizard YouTube Music Converter
To make your audio "Slides-ready," use ViWizard YouTube Music Converter. This tool takes care of encryption and formatting when you download from YouTube. It's perfect for both YouTube Music Premium and free users who want background music for their presentations.
With ViWizard, you can:
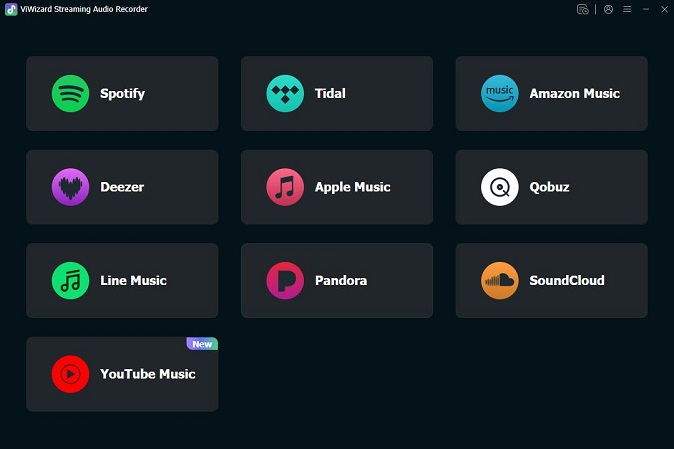
- 🎵Download from multiple sources: Get music from YouTube Music and 9 other platforms like SoundCloud, Spotify, Apple Music, and more.
- ✨ High-Fidelity Audio (320kbps): Your background music will sound sharp and professional on big speakers, not muffled.
- 💽 Google Drive Compatibility: It converts tracks into MP3 or WAV, which Google Slides needs for smooth playback.
- 💼 Use it anywhere: Great for Google Slides, video projects, or personal presentations without the worry of copyright issues or buffering.
Download songs, playlists, albums, and your whole music library from 10 major streaming platforms, including YouTube Music, to MP3, FLAC, WAV, AIFF, M4A, or M4B with original sound quality and full song info and keep your music forever.
How to Download YouTube Music for Google Slides
Step 1 Configure for Google Slides Compatibility
Open ViWizard and go to Menu > Preferences > Conversion. Select MP3 or WAV as the output format, since these work best with Google Slides. Set bitrate to 256 kbps or higher for clear sound. Choose an easy-to-find output folder and click OK to save settings.

Step 2 Access Your YouTube Soundtrack
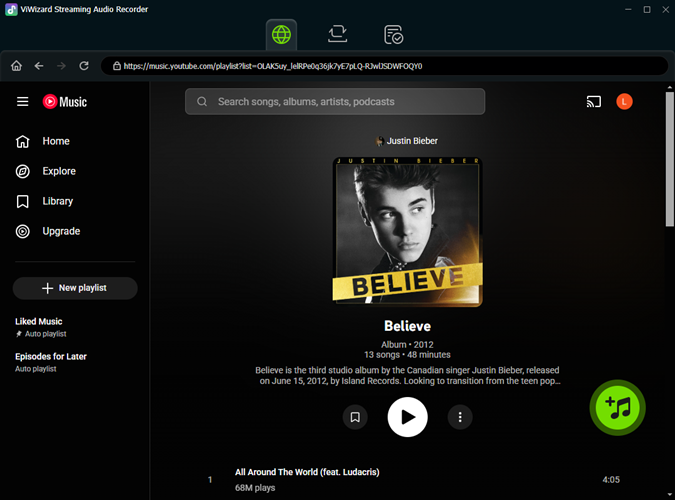
Launch the built-in YouTube player within ViWizard. You can sign in to your account to access your curated "Presentation Playlists" or "Liked Songs," or simply use the search bar to find the specific background track, ambient noise, or cinematic score you need for your slides.
Step 3 Add Tracks for Your Presentation
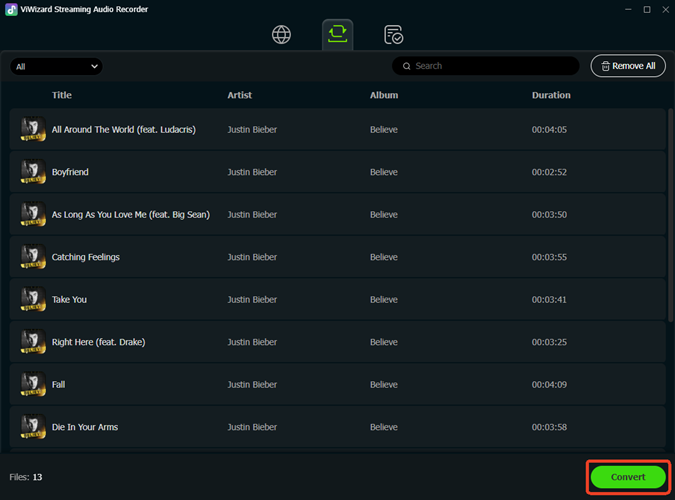
Browse for the song, album, or playlist that fits your slide deck's mood. When you find the right track, click the Add (+) button. You can select a single track for one slide or use the "Select All" feature to batch-download multiple tracks if you plan on having different music for different sections of your presentation.
Step 4 Convert and Prepare for Google Drive
Click the Convert button to start the high-speed download. ViWizard will preserve the original audio quality and ID3 tags. Once finished, click the Folder icon to find your local files. You are now ready to add these tracks from YouTube Music to Google Drive and insert them directly into your slides.
How to Add Music from YouTube to Google Slides
Once you have your MP3 or WAV file ready, follow these steps to add it to your presentation.
Step 1Upload YouTube Music to Google Drive
- Go to drive.google.com .
- Click + New > File upload and select your converted YouTube MP3.
- Your music files will now appear in Google Drive, ready to use.


Step 2Insert YouTube Music to Google Slides
- Go to Google Slides and open your presentation.
- Click the slide where you want the music to begin. Typically, it's the first slide, but you can pick any slide.
- Go to the top menu and click Insert > Audio.
- In the window that appears, navigate to your Google Drive folder, select your audio file, and click Insert.
- A small speaker icon will appear on your slide.


Step 3Set Audio Playback Options
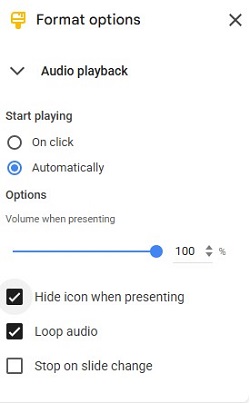
- Select the inserted audio icon on the slide.
- A toolbar will appear. Change Start playing on click to Automatically.
- Uncheck the box that says "Stop on slide change." This allows the YouTube music to play across your entire presentation.
- Check Loop audio if you want the track to restart once it ends.
- Check Hide icon when presenting so the speaker logo doesn't clutter your slide.
Step 4Test Your Presentation
Click the Slideshow button at the top right. Your music should start immediately and continue playing as you click through your slides.
Method 2: Add YouTube Music Link to Google Slides
If you are in a rush and have a stable internet connection, you can embed a YouTube video directly into your slide. While this is a "video" feature, you can shrink and hide the video player so it functions like background music.
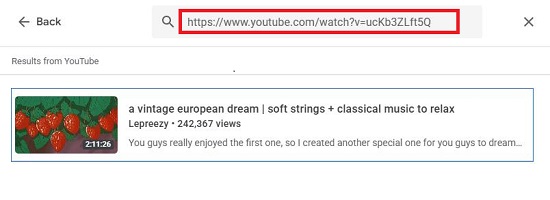
Step 1Copy the YouTube Video URL
- Go to YouTube and find the music or lyric video you want to use.
- Copy the URL from the address bar.
- Ensure the video is "Public" or "Unlisted." If it is "Private," it will not play during your presentation.

Step 2Insert the Video into Your Slide
- Open your Google Slides and go to the slide where the music should start.
- Click Insert > Video from the top menu.
- Select "By URL" in the pop-up window, paste your link, and click Insert.
- The YouTube video thumbnail will now appear on your slide.
Step 3Configure for "Audio-Only" Playback
- Right-click the video and select Format options.
- Under Video playback, select Play (automatically).
- You can set a "Start at" and "End at" time if you only want a specific portion of the song to play.
- The YouTube video thumbnail will now appear on your slide.

Step 4Hide the Video Player
- Click the corners of the video and drag them inward to make the player as small as possible.
- Drag the tiny video box to a corner or off the main visible area of the slide.
If you want the music to keep playing on every slide, you can copy and paste the audio player into the same corner on each slide. A small icon might be visible to you, but your audience won't notice it once the music starts. Keep in mind, though, the music will pause and restart every time you switch slides.
Comparison: Download & Upload vs. YouTube Link Method
Now that you've learned two ways to add music from YouTube to Google Slides, let's compare them side by side. Each method has its pros and cons depending on your needs — whether it's convenience, customization, or offline access.
| Feature | Download & Upload via Google Drive | Insert Link from YouTube |
| Internet Required During Playback | ❌ No (once uploaded to Drive) | ✅ Yes (must be online) |
| Plays Across All Slides | ✅ Yes (Seamless, no gaps) | ❌ No (Restarts or stops on each slide) |
| Music Playback Control | ✅ Auto-play or on click | ⚠️ Limited control — autoplay works, but may stop on slide change |
| Audio Customization | ✅ Trim, edit metadata, adjust volume | ❌ Not possible |
| Visual Appearance | ✅ Hidden (Clean slides) | ⚠️ Visible (Small video box remains) |
| Ease of Setup | ⏳ Requires tool and uploading steps | ✅ Very quick with just a link |
| Offline Playback | ✅ Yes | ❌ No |
| Best For | Professional Background Music | Quick clips or one-off references |
💡 Which Method Should You Choose?
- Choose Download & Upload if you want full control over your audio, offline access, and a seamless playback experience.
- Choose Insert Link if you're short on time and don't mind manually starting the music during your presentation.
Conclusion
Adding music from YouTube to Google Slides doesn't have to be complicated. Embedding a direct video link works for a single slide, but it often falls short for professional presentations due to ads and playback gaps between slides.
For a smooth, high-quality experience across your entire deck, the Download & Upload method is the best choice. With ViWizard YouTube Music Converter, you can turn any YouTube track into a slide-ready MP3. This ensures your background music stays uninterrupted, ad-free, and fully under your control.
You May Be Interested


Matt Smith, a digital entertainment industry enthusiast at ViWizard, is dedicated to providing insightful commentary and solutions for music and media-related topics, including industry trends, analysis, and recommendations.
Leave a Comment (0)