


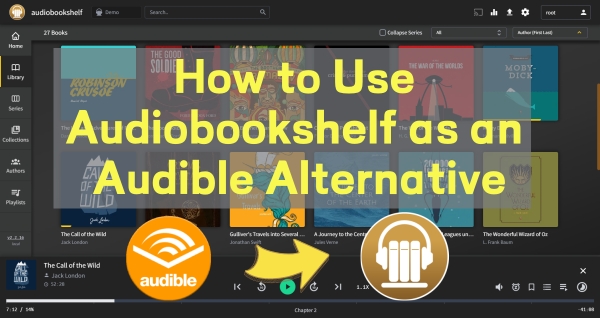
Listening to audiobooks is now a popular form of entertainment for people of all ages. According to the Audio Publishers Association Consumer Surveys, over half of American adults have listened to an audiobook. Among the many platforms available, Audible reigns as the largest and most popular one in the world, boasting a massive catalog of over one million titles.
With such an abundant library at their fingertips, users naturally want the freedom to enjoy their favorite stories across all their personal devices. Unfortunately, Amazon locks its ecosystem down with DRM restrictions that make cross-platform listening difficult.
If you want a superior listening experience and total control over your digital library, switching to Audiobookshelf is a good solution. This article provides an easy, step-by-step guide to installing and using Audiobookshelf as your personal, self-hosted alternative to Audible.
Part 1. What is Audiobookshelf?
Audiobookshelf is a free, open-source media server that allows you to self-host and organize your personal collection of audiobooks and podcasts. You can think of it as a personal and private alternative to audiobook platforms like Audible or Spotify. With Audiobookshelf, you have complete control over your audiobook files. Also, your listening experience will never be interrupted by Audible's service changes.
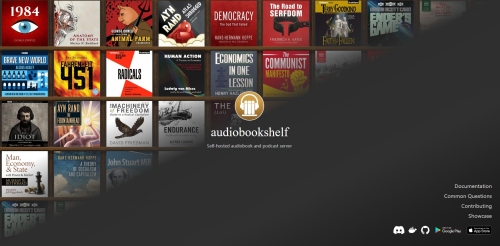
Here is another explanation to help you better understand it. Audiobookshelf works as a media hosting server. You can upload the audiobook files first. Then, you get a well-structured library. There are audiobooks downloaded from Audible, Libby, or other platforms. You can access and manage the library seamlessly across your devices, whether you're at home or on the go. Even your friends and your family members can access the library.
Part 2. What Can Audiobookshelf Do?
The core feature of Audiobookshelf is its smart library management. It can classify audiobooks using multiple tags such as series, progress, language, genre, author, and more. All metadata and cover art are neatly preserved, and you can even edit chapters or embed metadata directly into your audio files.
Audiobookshelf also helps you keep track of your listening progress. It supports continue listening and bookmarks, and provides a progress indicator for each audiobook. Better yet, your progress syncs across all your devices, giving you a seamless listening experience no matter where you pick up from.
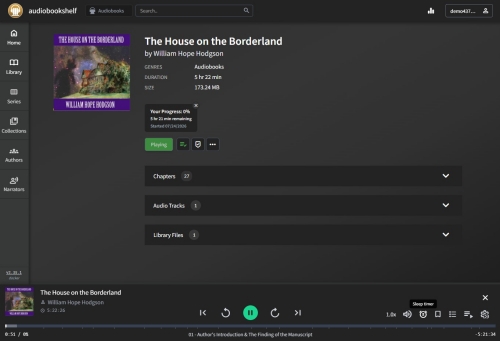
It's worth noting that Audiobookshelf supports both online and offline listening. You can enjoy your audiobooks directly within the app without needing to switch to another player. It offers a full set of playback controls, so you can easily adjust playback speed and volume. You can also set a sleep timer or build a player queue, which is ideal for long listening sessions.
There's even more. Audiobookshelf also lets you read e-books and listen to podcasts. It supports e-books in EPUB, PDF, CBR, and CBZ formats. For podcasts, it can automatically download and organize new episodes when you subscribe to RSS feeds.
Part 3. How to Use Audiobookshelf on Windows
There are multiple ways to get Audiobookshelf running on Windows. You can install the Audiobookshelf desktop app for basic in-home self-hosting. If you want a 24/7 service that's always available, however, you'll want to install it via Linux and Docker instead.
With just the Windows app, the server only works while you're logged into your Windows user profile. If your PC goes to sleep, restarts for a Windows update, or you close the app window, the server goes offline — and your phone app will immediately lose its connection.
When installed via Linux or Docker, Audiobookshelf can run completely hidden in the background as a system service. It boots automatically when your computer turns on, uses very little background memory, and stays online 24/7.
In short, choose the Windows app if you only want to listen to audiobooks on your local desktop and don't need to stream to your phone outside the house. To help you get started quickly, here's how to install the Audiobookshelf Windows app. To get it through Docker or Linux on Windows, refer to Part 4 or Part 5. Options may be different, but the steps are the same.
Step 1: Get Started with Audiobookshelf
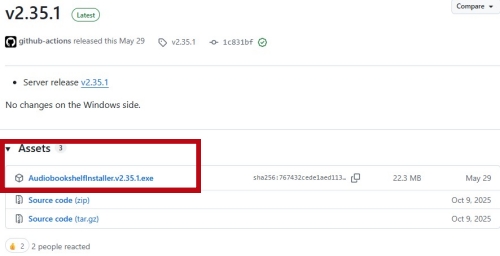
01On your web browser, go to the Audiobookshelf Windows GitHub releases page. You can search for it on Google and navigate to the right page. Click AudiobookshelfInstaller.v2.35.1.exe under the Assets section to start downloading.
02Launch the installer. If Windows stops it, choose to continue. If you do not see the option to continue, click More Info.
03Follow the prompts to finish installation.
04Launch Audiobookshelf by double-clicking the shortcut. It will then appear in the system tray. Right-click the Audiobookshelf icon in the system tray and click Open Audiobookshelf….
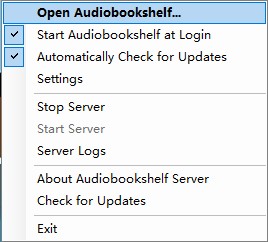
05In the new tab, create your admin username and password. Then create a new library and map it to the folder on your computer where your converted audiobooks are saved.
Step 2: Open the Firewall Port
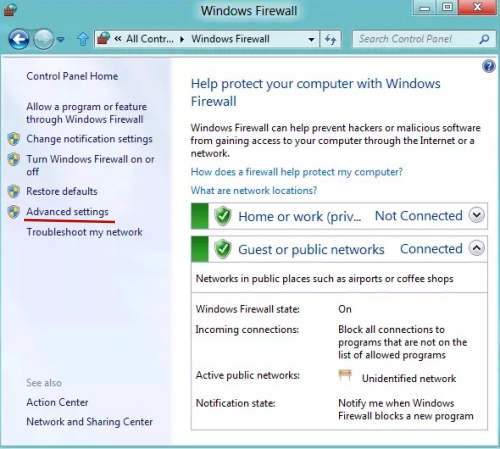
01Go to the Windows Defender Firewall. Click Advanced Settings on the left side. Click Inbound Rules on the top left.
02Next, click New Rule… on the far right. Choose Port and click Next. Select TCP and type 13378 into the Specific local ports box. Click Next.
03Choose Allow the connection and click Next through the remaining windows, giving the rule a name like Audiobookshelf.
Step 3: Connect to Your Mobile Device
01Type cmd in the search bar at the bottom of the screen. Press Enter to open the Command Prompt.
02Type ipconfig and press Enter. Look for the IPv4 Address.
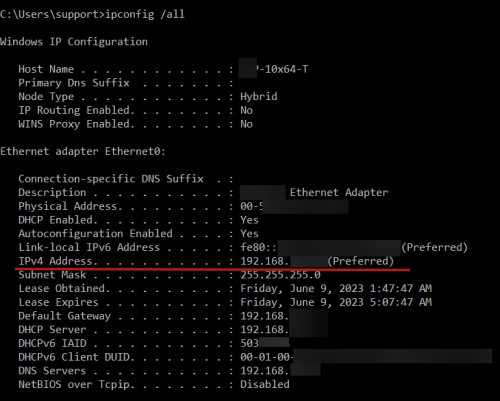
03Open the Audiobookshelf app on your mobile device. Connect it to your home WiFi.
04Type the IPV4 address in the form of: http://your-IP-address: 13378
05Enter the username and password you created just now. Then, you can freely enjoy the service provided by Audiobookshelf.
Part 4. How to Use Audiobookshelf on Mac
If you are a user on Mac, unfortunately, there is no native macOS app installer for Audiobookshelf. However, you can still get it up and running through a Docker container. This is also the most recommended way according to the official Audiobookshelf documentation. While this approach is more involved than simply installing a Windows app, the steps below will guide you through the process.
Step 1: Get Started with Docker Desktop
01Download and install Docker Desktop for Mac from the official Docker website. Make sure you've selected the correct version for your Mac hardware.
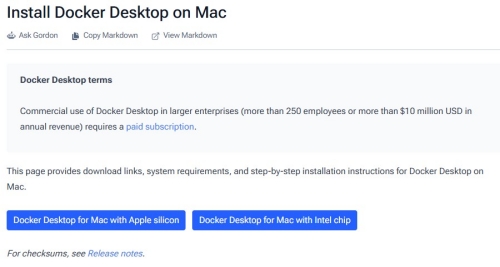
02After the download, open Docker Desktop and allow it to run in the background. To help you get started, you can learn from the tutorial How do I run a container after you launch Docker Desktop.
03Open Finder and go to your user home directory or Documents folder. There, create a base folder named audiobookshelf. (On Windows, press Win + E to open File Explorer.)
04In the base folder, create four distinct subdirectories, named respectively audiobooks, podcasts, config, and metadata.
Step 2: Launch Audiobookshelf Server via Docker
01Open the built-in Terminal app on Mac. You can press Command + Spacebar and search for Terminal. Then, press Enter. (On Windows, open Notepad and paste the standard configuration text below in a blank text document.)
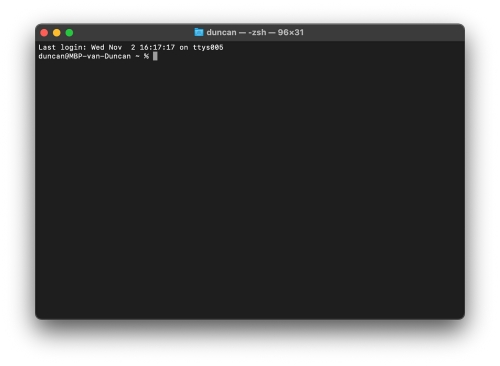
02Change your active directory to the base folder you created just now. You can copy the code below if your folder path is the same as it:

03Create a configuration file by typing nano docker-compose.yml. Then paste the standard configuration text into it. Replace the path to the left of the colon with the absolute path to the folder on your computer by copying and pasting. You should check the version and the time zone again. Make sure they are correct in case Audiobookshelf goes wrong.
04To save it, press Ctrl + O. Press Enter. Then, press Ctrl + X to exit the text editor. (On Windows, save the document file in the form of All Files by clicking File > Save As… > Text Documents > All Files.)
05Input the command below to launch the Audiobookshelf Docker container. If it's your first time using Docker, you will see Docker downloading layers of the software. (On Windows, open the audiobookshelf folder, hold down Shift, and right-click any empty white space inside the folder. Click Open PowerShell window here or Open in Terminal.)
Step 3: Configure the Audiobookshelf Library
01Open your browser and type the local host address into the address bar:
02Create a root administrator user account and password. Since Audiobookshelf supports multi-user, you can then create a dedicated user profile to use only for listening to audiobooks or podcasts. Click the settings icon and select Users. Click Add User, and then you can adjust the details for the new profile. Next, click Create.
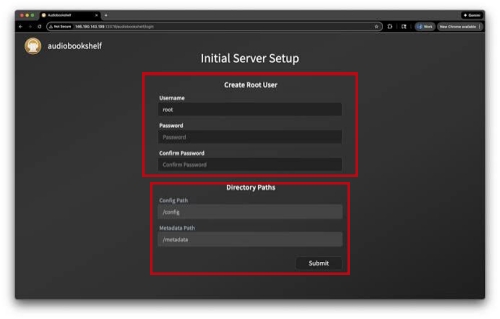
03Click Add Library to create your audiobook library. You can set the name and media type as you want. You can set the metadata provider as Google Books. Be sure to map the Folders to the right path inside the container.
Part 5. How to Use Audiobookshelf on Linux
Audiobookshelf runs most smoothly on Linux, and the installation and configuration process is the most reliable of all platforms. Compared to running it on Windows, you'll encounter far fewer errors. Besides, you can access Audiobookshelf without using Docker at all. Here is the step-by-step guide to get Audiobookshelf installed on Linux.
01Open Terminal on Linux. Click the application menu and type terminal into the search bar. Click the Terminal app.
02Paste the code below. If you paste line by line, make sure you click Enter after each line. It's ok that no window or words are coming out after you click Enter.
wget -O- https://advplyr.github.io/audiobookshelf-ppa/KEY.gpg | gpg --dearmor | sudo tee /etc/apt/trusted.gpg.d/adb-archive-keyring.gpg 1>/dev/null
sudo curl -s -o /etc/apt/sources.list.d/audiobookshelf.list https://advplyr.github.io/audiobookshelf-ppa/audiobookshelf.list
03To download and install Audiobookshelf, enter the code below into the Terminal:
sudo apt install audiobookshelf
04The configuration will then be finished automatically. By default, it sets up these paths and options.
CONFIG_PATH=/usr/share/audiobookshelf/config
FFMPEG_PATH=/usr/lib/audiobookshelf-ffmpeg/ffmpeg
FFPROBE_PATH=/usr/lib/audiobookshelf-ffmpeg/ffprobe
PORT=13378
05You can start the service by choosing the code from below:
sudo systemctl enable audiobookshelf.service
Part 6. How to Use Audiobookshelf on Android & iOS
To use Audiobookshelf on mobile devices, you should first set up the Audiobookshelf server on your desktop. You can follow the methods above to get it ready. For Android users, you can use the Audiobookshelf mobile app to get a full experience. The official app works perfectly on Android.
For users on iOS, though the iOS Audiobookshelf app does exist, it can only be installed officially through TestFlight, which is currently full. Fortunately, there are still some native iOS clients for Audiobookshelf, such as AudioBooth, Plappa, ShelfPlayer, and SoundLeaf. AudioBooth is totally free and reliable, but it doesn't support CarPlay. The other three choices are also free to start, but there are some services requiring being paid.
Compared to the complicated settings on a computer, the steps to access the Audiobookshelf server on mobile devices are rather easier.
01Download and install the Audiobookshelf app for Android, or an Audiobookshelf client for iOS. You can use the Google Play Store or App Store to get it ready.
02Tap the Server URL input box. If you open the app for the first time, you will be prompted to connect. Just follow the prompts. If you've already logged in on your phone or tablet, tap the settings or menu icon and look for the server or connection section.
03Type the server's address. If you are inside your home network where your desktop is connected, type in the form: http://your-IP-address: 13378. If you are outside your home network, type your public reverse proxy address or Tailscale IP if configured.
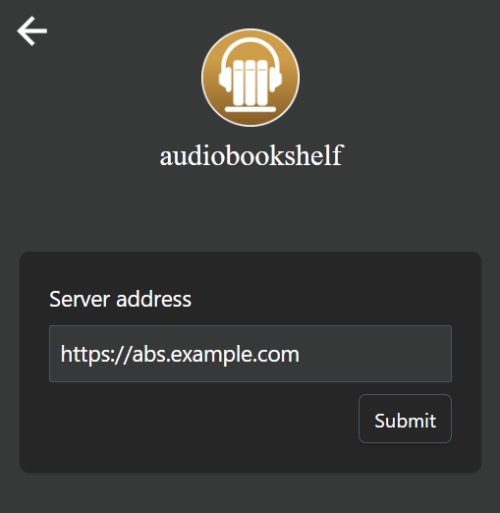
04Enter your account name and password to log in.
05Now you can browse your audiobook library on Android. Listen to your audible audiobooks or download them. All the progress will sync up automatically. To upload books, you should use the Audiobookshelf website on your desktop.
Part 7. A Better and Safer Audiobookshelf Alternative
Audiobookshelf is a fantastic platform for managing and accessing your audiobook library across devices. However, it requires a fairly complicated setup, and it can't play DRM-protected audiobooks. If you're simply looking to enjoy your Audible audiobooks or podcasts on any device without the hassle, you can choose ViWizard Audible Converter as a better and simpler alternative.
ViWizard Audible Converter can download Audible audiobooks and podcasts in the format of MP3, M4A, WAV, and more while removing the DRM restrictions. It also supports batch conversion, which saves you a significant amount of time if you have a large Audible library. Additionally, all metadata will be preserved so you can better manage audiobooks.
Besides the powerful features, ViWizard Audible Converter is also easy to use. Follow the steps below to start your free trial.

Key Features of ViWizard Audible Audiobook Converter
Free Trial Free Trial* Security verified. 5,481,347 people have downloaded it.
- Convert Audible audiobooks without AA/AAX format limitations
- Export audiobooks in 6 formats for different devices and players
- Split audiobooks by chapters or sections for personalized listening
- Preserve chapter information and metadata when creating collections
- Manage Audible audiobook libraries across converted files
 Step 1: Unlock your Audible Library
Open ViWizard Audible Converter after installation. There will be a quick start window if you launch it for the first time. Learn how to use the tool and then close the window. Click the Sign in button and log in to Audible.
 Step 2: Confirm Output Settings
Click the three-line icon at the top-right corner of the interface. Then click Conversion and choose a suitable output format for your device. You can also adjust the output directory rule to better manage your audiobook files.
 Step 3: Add Conversion Tasks
Open any audiobook in the built-in Audible browser. Click the green add icon at the bottom-right. Next, click Add to List. You can also click the Library button under the Audible logo. Then, click the add icon to batch select audiobooks in your library.
 Step 4: Start Conversion Tasks
Click the conversion icon at the top-center of the interface after you finish adding conversion tasks. Next, click Convert. If you want to split any audiobook, hover your mouse over it and click the split icon next to each item. Choose a preferred split mode.
Conclusion:
Audiobookshelf is a powerful tool that lets you manage and share a vast audiobook library across devices, anytime and anywhere. It supports multiple operating systems, including Windows, macOS, Linux, Android, and iPhone. However, considering the technical issues and your actual needs, ViWizard Audible Converter can also be a great alternative. It downloads Audible audiobooks without DRM restrictions, so you can enjoy them across all your devices just as easily.
You May Be Interested




Matt Smith, a digital entertainment industry enthusiast at ViWizard, is dedicated to providing insightful commentary and solutions for music and media-related topics, including industry trends, analysis, and recommendations.

Leave a Comment (0)