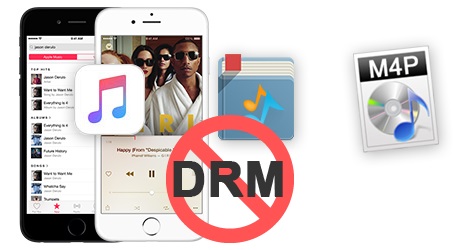
When you change a new computer, you may meet a problem that all your songs and movies, especially the purchases in iTunes are still stored on a previous computer, but you can't wait to start using your new computer while enjoying movies and songs. Besides, due to the DRM restrictions, your purchased music and movies can only be playable within iTunes. So, you may wonder how to transfer iTunes purchases to another Apple ID. In this guide, you'll find several ways to transfer purchases from one iTunes account to another quickly and easily.
Part 1. How to Buy Songs/Movies/Audiobooks on iTunes
iTunes allows you to buy music, movies, TV shows, and audiobooks with an Apple ID. Then you can listen to your purchases on your computer or your iPhone, iPad, or iPod touch. If you want to purchase your liked media content from the iTunes Store, you can follow the below steps.
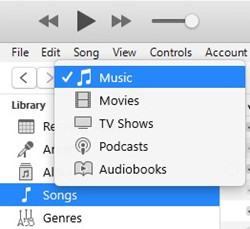
Step 1. Open iTunes on your PC and click Music or Movies from the pop-up menu at the top left.
Step 2. Click Store and enter a word or phase in the search field to find your liked music or movies.
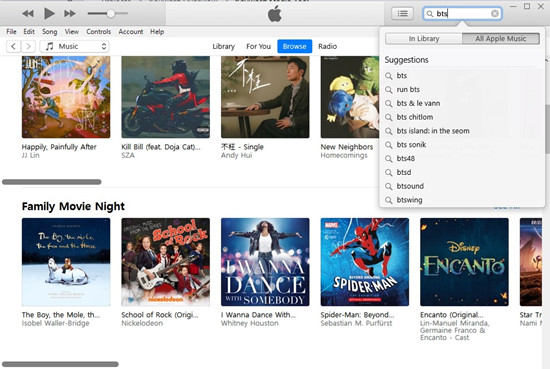
Step 3. Press Enter, select an item in the iTunes window, and click Preview to see the item details.
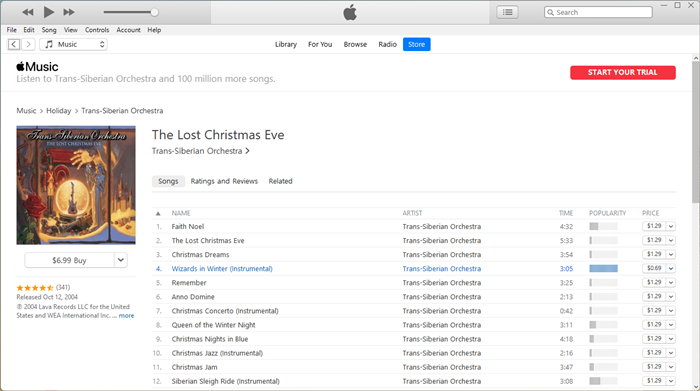
Step 4. Click Buy and enter your Apple ID and account in the pop-up window, then click Buy.

Can you still buy music on iTunes? Yes, you can purchase music from iTunes even without subscription to Apple Music. However, you still can't play music you've paid for without Apple services, but here's a solution to download and play iTunes music everywhere without restriction.
Part 2. How to Transfer Purchases from One iTunes Account to Another
It's easy to transfer iTunes purchases to another Apple ID. Here you can make use of the following methods to complete the transferring of iTunes purchases to another Apple ID or computer.
Method 1. Transfer iTunes Purchases Using Home Sharing
iTunes comes with a nifty feature called Home Sharing. By using Home Sharing, you can import items from up to five iTunes libraries on other computers. Once enabled, this broadcasts your iTunes library over your Home Sharing network, meaning other computers can browse and play items from your iTunes library on their respective versions of iTunes.
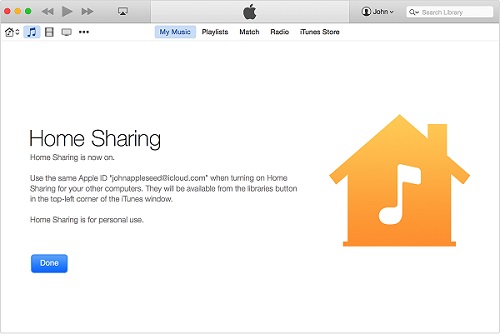
Step 1. Make sure that both your computers are connected to the network and have the latest version of iTunes.
Step 2. Open iTunes on the computer you want to import from and click File > Home Sharing > Turn On Home Sharing.
Step 3. In the pop-up window, enter your Apple ID and password, then click Turn On Home Sharing.
Step 4. On the computer you want to import to, open iTunes and turn on Home Sharing, then choose a shared library from the pop-up menu at the top left.
Step 5. Click the Show pop-up menu at the bottom of the iTunes windows, then choose Items not in my library.
Step 6. Select the items you want to import, then click Import. Now your iTunes purchases are imported to another computer.
Method 2. Transfer iTunes Purchases Using Family Sharing
Another option to transfer or share iTunes purchases is using Family Sharing. By using Family Sharing, up to six family members can download each other's iTunes Store purchases to their own computers and devices. If you want to transfer your iTunes purchases to another Apple ID or computer, you can consider using this feature in iTunes.
Step 1. In iTunes, click Account > Family Purchases.
Step 2. Then click a name near the top-left corner.
Step 3. Choose a family member you want to share iTunes purchases with.
Step 4. Click the iCloud Download button to download any iTunes purchases.
Method 3. Copy iTunes Purchases Using External Drives
The above ways might be the easiest one to copy your iTunes purchases between different computers. But you can transfer your media without relying on any fancy iTunes features. Instead, you can just copy your iTunes purchases using external hard drive, or a flash drive, or a data CD.
The iTunes media folder is located in C:/Users/[User Name]/My Music/iTunes. You can simply copy the iTunes files to your external drive. After inserting your external drive into the target computer, simply select the whole lot and drag them into iTunes window. This will add all those files you had selected to that iTunes library.
Wondering whether it's possible to burn Apple Music to CD? Here we go. This tutorial will show you how to burn Apple Music to CD in a few clicks only.
Method 4. Share iTunes Purchases Using AirDrop
Another workaround to transfer iTunes purchases is via the home network. Shared folders have been available for a very long time, but in recent versions of macOS, AirDrop has been added as an alternative. Every user on a network with AirDrop selected in Finder are able to see one another. Sharing files from one Mac to another then becomes as simple as dragging and dropping your files on another computer's icon.
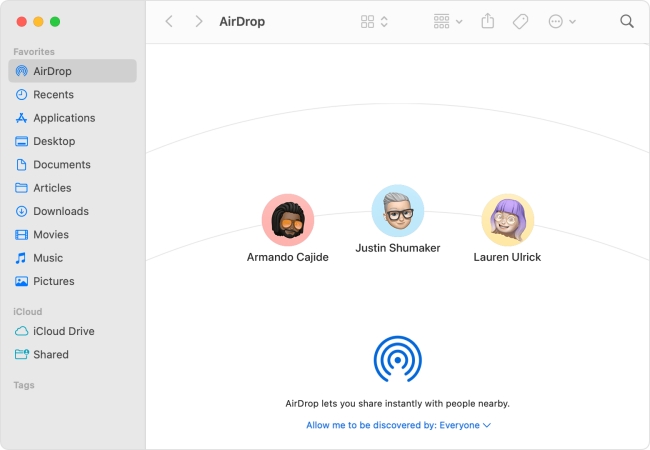
Step 1. Select your purchased iTunes content that you want to share, then click the Share button in the app windows.
Step 2. From the sharing options listed, click AirDrop and choose a recipient to send.
Method 5. Sync iTunes Purchases Using iTunes Match
iTunes Match is a paid service that stores all of your music files through iCloud, including files that you added to your library from CDs or sources other than the iTunes store. If the content you are trying to copy from your iTunes library to other computer are music files, you can follow this method here.
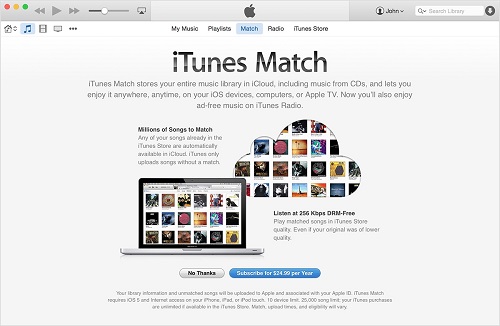
Step 1. In the iTunes app, sign in to the iTunes Store using the same Apple ID that you used to purchase songs and movies.
Step 2. Click Edit > Preferences, then click General.
Step 3. Select the iCloud Music Library checkbox. Then all your purchased iTunes contents will be synced to other computers.
Method 6. Transfer iTunes Purchases Using ViWizard Software
Keep in mind that all iTunes purchases are still protected by Apple's DRM. If you are looking for an easier and more straightforward solution so that you can transfer iTunes purchases to any device without limit, you can remove DRM protection from iTunes purchases with a third-party iTunes DRM removal tool, such as ViWizard Audio Converter and ViWizard M4V Converter. For more details on how to get rid of DRM from iTunes music, movies, TV shows, and audiobooks, you can follow this guide.
How do you remove DRM from iTunes music? Here are 5 most popular methods introduced in this post, and have a try now.
Part 3. How to Download Previous iTunes Purchases on Computer
With the above methods, you can transfer or sync iTunes purchases to another Apple ID or computer. However, you can authorize up to five computers to manage and enjoy your iTunes purchases thereon. If you previously purchased music and movies from the iTunes Store, you can download them to your authorized computers and devices. Downloading previous purchases is a great way to transfer your iTunes purchases to another computer without having to sync or copy files. Then you can follow the below steps to download previous iTunes purchases on PC.
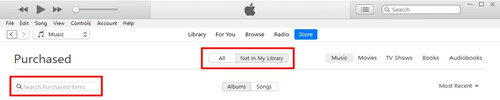
Step 1. Open iTunes and choose Music from the pop-up menu at the top left, then click Store.
Step 2. Near the top right of the iTunes Store window, click Purchased.
Step 3. Click Music, Movies, TV Shows, or Audiobooks near the top right of the Purchased page.
Step 4. Click the iCloud Download button to download your purchases in iTunes.
Conclusion
After reading the whole post, you'll know how to transfer iTunes purchases to another Apple ID or computer. For making your iTunes purchased audios and videos playable anywhere, you can consider using ViWizard Audio Converter or ViWizard M4V Converter. Do you know any other ways to transfer iTunes purchases to another Apple ID ID? Or do you have any question with the ways listed above? Don't hesitate to share your comments below!
You May Be Interested

Dave Henry, a multimedia technologist at ViWizard, focuses on delivering the best solutions for digital media challenges, including audio and video conversion, media optimization, and troubleshooting.
Leave a Comment (0)