


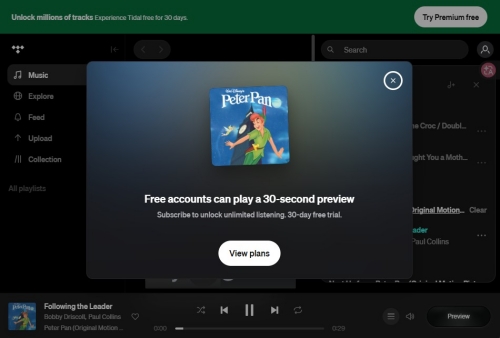
Tidal is one of the most popular music streaming platforms in the world, widely praised for its high-fidelity audio quality and exclusive artist content. While Tidal already commands a solid share of the streaming market, it introduced free, ad-supported plans to attract an even broader user base. During Tidal's free trial, you can listen to the first 30 seconds of a song before an ad pops up. To skip to the next track, you'll first need to close a subscription ad.
The constant interruption can quickly ruin your listening experience. Even for paid users who have stopped subscription, occasional promotional ads can still sneak in and pull you out of the music. This guide covers three practical methods to help you block those interruptions and enjoy a fully immersive, ad-free Tidal listening experience.
Part 1. Does Tidal Have Ads?
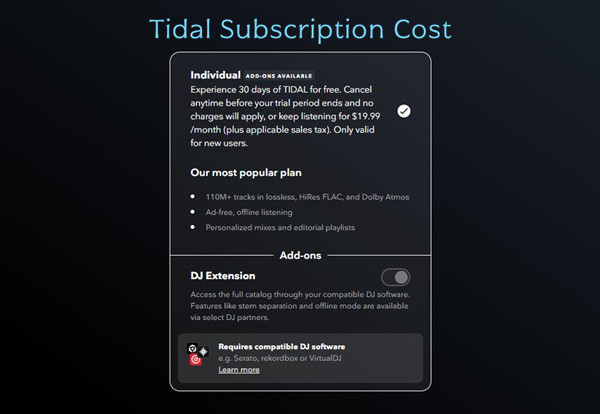
If you're on any of Tidal's paid subscription plans, the answer is simple. No ads at all. However, if you're using a free account or have canceled your subscription recently, you will encounter Tidal's audio ads to promote its plans, typically after you've listened to several songs in a row. Here's a quick overview of how ads vary across different Tidal subscriptions:
| Subscription | Ad-free | Price |
| Free Plan | No | $0 |
| Individual Plan | Yes | $11.99/month |
| Student Plan | Yes | $6.99/month |
| Family Plan | Yes | $19.99/month |
| 30-Day Free Trial (New Account) | Yes | $0 for 30 days, $2 for60 days |
It's also worth noting that Tidal actually has two types of ads. The first is visual banner ads, which appear as static images within the app. These are relatively unobtrusive. If you're focused on the music and not staring at the screen, they won't bother you much. The second, and far more disruptive, is audio ads. These play suddenly between tracks and can seriously break the immersion of your listening session. This kind of ad is the most terrible one.
Part 2. How to Remove TIDAL Ads with a Subscription Upgrade
The most straightforward and official way to remove ads from Tidal is to upgrade to a paid subscription plan. All paid plans on Tidal offer ad-free listening, along with full access to the Tidal music library. Whether you're listening on your phone or desktop, the upgrade process is quick and easy. Just follow the steps below.
On Windows or macOS
If you use Tidal on a desktop app or through the web player, you'll need to upgrade your subscription via a web browser. Even if you normally listen through the desktop app, the subscription management must be handled on the Tidal website. The steps below will guide you to the right page and help you switch plans in just a few clicks.
01Open the Tidal desktop app or go to the Tidal website using your preferred web browser. If you haven't logged in for a while, you may be prompted to sign in first.
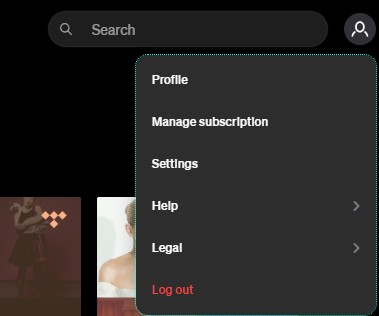
02Click the profile icon at the top-right corner of the Tidal interface.
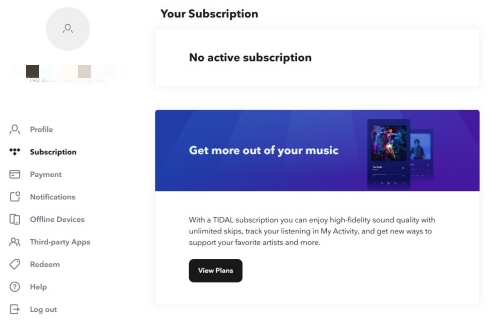
03Click Manage subscription from the dropdown menu. A new tab will automatically open in your browser. You'll see your current plan details in the Subscription section. If you're on the free tier or have previously canceled your subscription, it will display No active subscription.
04Click the View Plans button to browse the available options. Choose the plan that fits your needs and click Continue to proceed with the upgrade.
On Android or iOS
Just like on desktop, upgrading your subscription on a mobile device requires using a web browser. You can directly open your browser on your mobile device and navigate to the right page. Alternatively, you can go to the right page via the Tidal app on Android.
The steps are mostly the same on Android and iOS. If you're using the Tidal app on Android, follow all the steps below in order. If you're on iOS, skip the first three steps and begin by opening the Tidal website in your browser instead.
01Tap the Tidal app icon on your home screen to open it.
02Tap your Profile or the gear icon in the right corner of the Tidal app.
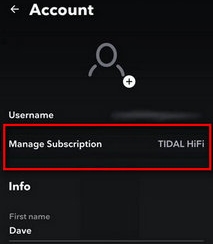
03Tap Manage subscription. Then, it will automatically open your default browser to Tidal Account Management.
04Log in to your Tidal account first if prompted.
05Go to the subscription tab, choose your new plan, and confirm your choice. If you can't find the subscription tab, click the three-line icon.
Part 3. How to Block TIDAL Ads with Browser Extensions
If you don't want to pay for Tidal, you can also choose browser extensions as an alternative. These extensions can also help you block even the visual ads that persist even for paid subscriptions. Several extensions work well for this purpose, including uBlock Origin, DarkReader, Bitwarden, and UltraWideo. Among them, uBlock Origin is by far the most popular and reliable choice, so here's a detailed guide on how to set it up.
01Download and install Ublock Origin on your browser. Its full capabilities on Chrome are limited due to browser restrictions. Therefore, it's recommended to use Ublock Origin on Firefox.
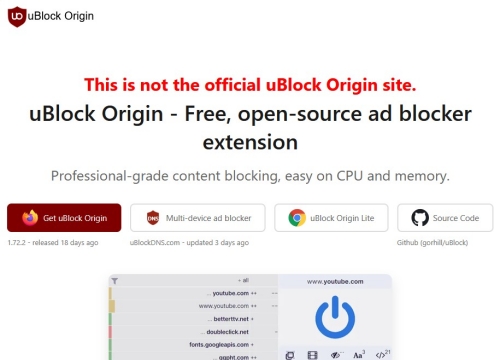
02Once installed, click the extensions icon in your browser toolbar and select uBlock Origin. If you've pinned the uBlock Origin icon to your toolbar, you can simply click it directly for faster access.
03Click the pen icon to manually select and block any ads that slipped through. The extension will run automatically after installation. However, if you still notice some ads appearing, you can use element picker mode to highlight and block them individually.
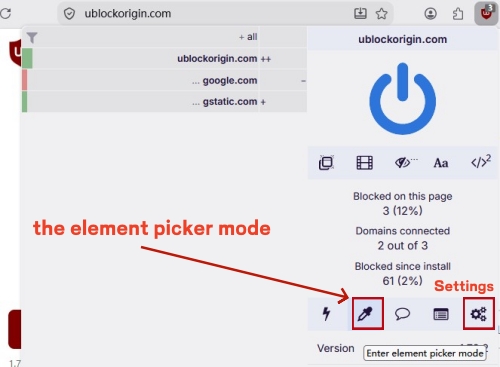
04Click the settings icon in the extension menu to get advanced settings. You can create a customized filter for Tidal if there are ads you have to block manually every time opening Tidal.
Part 4. How to Download TIDAL Music and Listen Ad-Free Offline
The two methods above are both popular ways to reduce or remove Tidal ads, as shared by many Tidal users. However, you have to pay monthly with the first method. The moment you cancel or let your subscription lapse, the ads come right back. Besides, you'll also lose full access to the songs in your library, even if you previously downloaded them for offline listening. As for the second method, it will sometimes fail to block ads, according to user reviews. So, is there a more reliable, guaranteed method?
Yes, there is. You can choose ViWizard TIDAL Music Converter to download Tidal music in MP3, FLAC, or more while keeping the original quality. Once downloaded, you can play your music offline on any device, completely free from Tidal's ads and restrictions. The files remain yours even after your Tidal subscription expires, so you never have to worry about losing access again.
Ready for an immersive, ad-free, offline Tidal listening experience? Have a free trial now.

Key Features of ViWizard TIDAL Music Converter
Free Trial Free Trial* Security verified. 5, 481,347 people have downloaded it.
- Convert TIDAL songs, playlists, albums, artists, podcasts, and audiobooks
- Export TIDAL music in 6 formats for different devices and players
- Preserve Hi-Res FLAC and original audio quality
- Preserve Dolby Atmos audio and metadata during conversion
- Batch download TIDAL playlists, albums, and large music collections
 Step 1: Add Conversion Tasks
Log in to your Tidal account in the built-in web player. Then, open the songs, playlists, or albums you want to download. Click the music icon at the bottom-right corner and add them to the conversion list.
 Step 2: Confirm Output format
Click the three-line button. In the Conversion section, choose a suitable output format. Choose FLAC if you value the audio quality. Choose MP3 if you want to play music on an MP3 player. More choices are available if you need them.
 Step 3: Start Conversion Tasks
Click the conversion icon to manage your conversion list. Click Convert to download the music instantly.
 Step 4: Enjoy Your Music
Click the download list icon, and you can see your downloads. Double-click any music to enjoy. If you want to transfer them to other devices, right-click and choose Open Folder to locate the audio files.
Part 5. Conclusion
To sum up, this article shares 3 methods to get rid of ads on Tidal. Officially, you can choose a suitable Tidal subscription plan. Alternatively, you can try using browser extensions to block ads. However, as users commented, this method may sometimes fail to work. For a better choice, you can use ViWizard TIDAL Music Converter for an immersive, ad-free listening experience.
You May Be Interested




Adam Gorden is always looking for new ways to explore music and videos. He likes trying different media tools and learning how to manage audio and video files with ease.

Leave a Comment (0)