If you have got a large number of media items like music, movies, TV shows, audiobooks, and books from iTunes, you'll probably found that it's not always convenient to view every media item being listed when browsing your iTunes library. Or you may just feel bored of listening to a same album or some same songs repeatedly. In these cases, it's necessary to hide purchases in iTunes. Luckily, iTunes provides straight access for you to hide purchases easily. The following will show you how to hide purchases in iTunes or unhide purchases in iTunes.
Part 1. How to Hide Purchases in iTunes
It's pretty easy to hide your purchases including music, movies, TV shows, audiobooks, and books from iTunes on your device. If you don't want to see the items that you purchased on any of your devices, you can choose to hide them. Here's how to hide purchases in iTunes on your PC, Mac, iPhone, or iPad. Let's see the details.
1.1 How to Hide Music/Movies/TV Shows on Mac
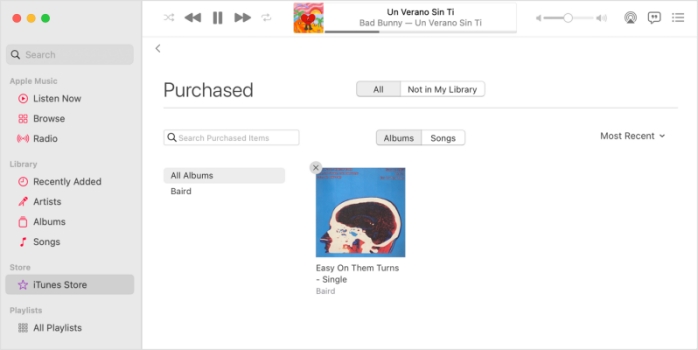
Step 1. Open the Apple Music app on your Mac, then click Account > Purchased.
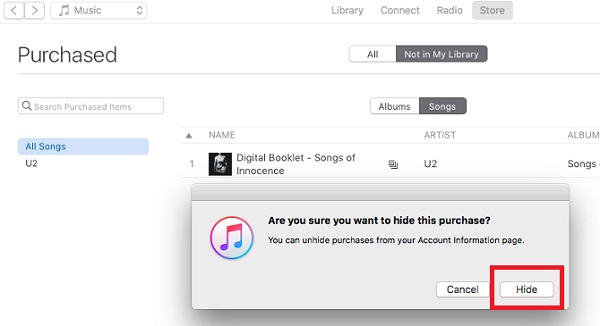
Step 2. Check the item that you want to hide and click the Hide Purchase button.
Step 3. Click Hide to confirm that you want to hide music in the Apple Music app.
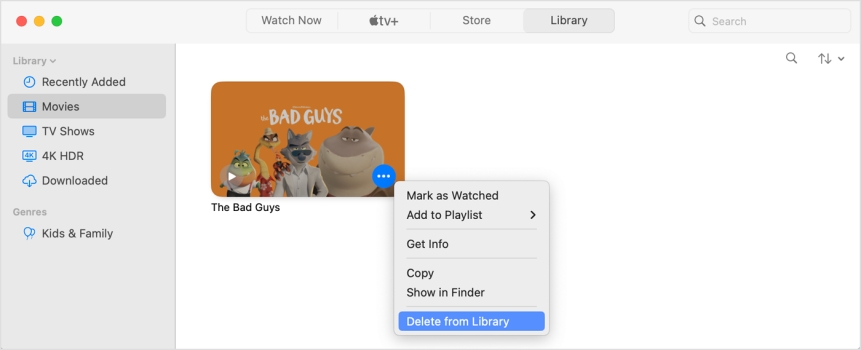
Step 1. Launch the Apple TV app on your Mac, then navigate to Library.
Step 2. Find the item that you want to hide and click the More button.
Step 3. Click Delete from Library, then moves and TV shows will be hidden in the Apple TV app.
1.2 How to Hide Music/Movies/TV Shows on PC

Step 1. Load iTunes on your PC, then click Account > Purchased from the menu bar.
Step 2. Switch to Music, Movie, or TV Shows at the top of the window, then click All.
Step 3. Select the item that you want to hide, then click the Hide Purchase button.
1.3 How to Hide Audiobooks/Books on iPhone/iPad

Step 1. Fire up the Books app on your iPhone, then tap Library.
Step 2. Find the book or audiobook that you want to hide and tap the More button.
Step 3. Tap Remove, then tap Hide Book or Hide Audiobook.
Part 2. How to Unhide Purchases in iTunes
For those hidden purchases, you can see them your library again by unhidding them in iTunes. It's see to find your hidden purchases in iTunes or Apple Music on your Mac, PC, iPhone, or iPad. To unhide your purchases in iTunes, you can follow the below steps on your device.
2.1 How to Unhide Music/Movies/TV Shows on Mac
Step 1. Open the Apple Music app or the Apple TV app on your Mac.
Step 2. In the menu bar at the top of your computer, head to Account > Account Settings.
Step 3. Sign in with your Apple ID in the pop-up window.
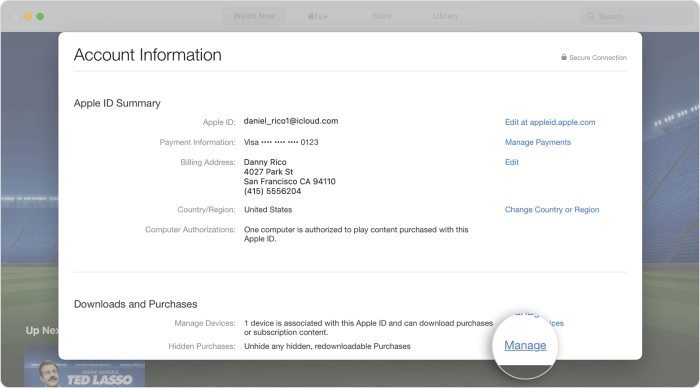
Step 4. Scroll to the Downloads and Purchases section, then you'll find Hidden Purchases.
Step 5. Click Manage to load the hidden purchases and click Unhide under the item.
2.2 How to Unhide Music/Movies/TV Shows on PC
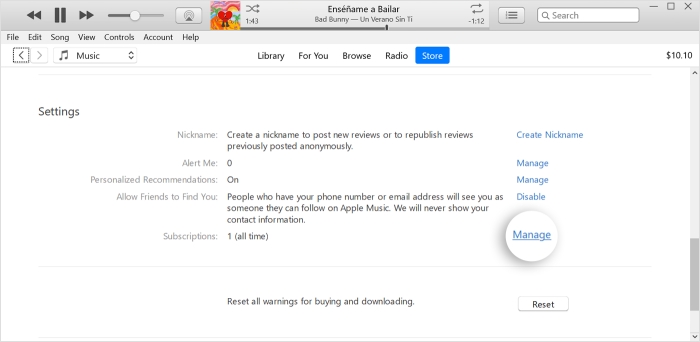
Step 1. Launch iTunes and click Account > View My Account from the menu bar.
Step 2. On the page that appears, scroll to the Downloads and Purchases section.
Step 3. Next to Hidden Purchases, you can see all your hidden items.
Step 4. Click Manage to view the details, then click Unhide to unhide what you want.
2.3 How to Unhide Audiobooks/Books on iPhone/iPad
Step 1. Start the Books app on your iPhone, then tap the Sign In button.
Step 2. Tap Manage Hidden Purchases, then sign in with your Apple ID if prompted.
Step 3. Choose the item you want to unhide and tap Unhide.
Part 3. How to Hide/Unhide Apps on iTunes
After the above introduction, you have known how to hide or unhide music, movies, TV shows, books, or audiobooks on your computer and mobile phone. In addition to hiding media content, you can hide an app in your list of purchases in the App Store if you don't want to see it. Here's how to hide or unhide apps on iTunes.
3.1 How to Hide Apps on iPhone/iPad/Mac
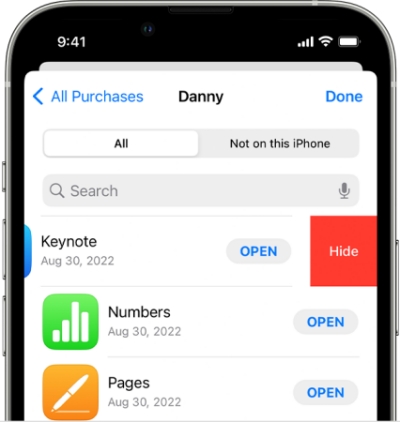
Step 1. Open the App Store app on your iPhone or iPad, then tap your profile image.
Step 2. Tap Purchased and find the app that you want to hide.
Step 3. Swipe left on the app and tap Hide, then tap Done.
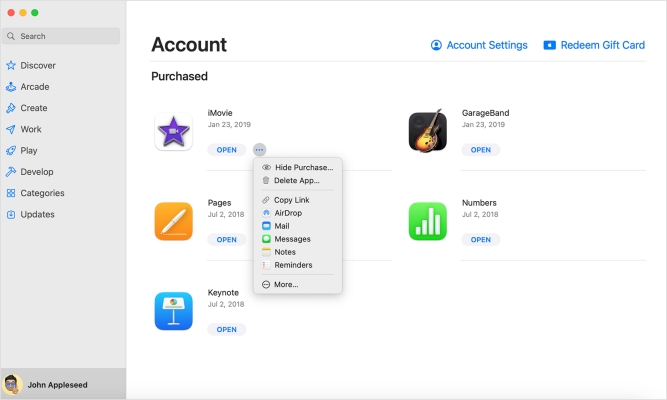
Step 1. Start the App Store app on your Mac, then click your Apple ID name at the bottom of the side bar.
Step 2. Browse all the purchased apps and select an app you want to hide in the App Store app.
Step 3. Click the more options button, then select Hide Purchase and click it again to confirm.
3.2 How to Unhide Apps on iPhone/iPad/Mac
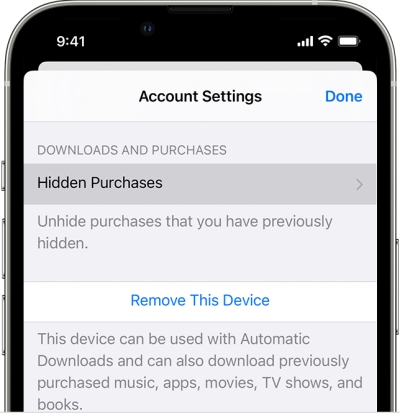
Step 1. Locate your photo at the top of the screen in the App Store app on your iPhone.
Step 2. Tap your Apple ID name, then enter your Apple ID password to sign in.
Step 3. Scroll down and tap Hidden Purchases to find the app that you want to unhide.
Step 4. Tap Unhide and go back to the App Store by tapping Account Settings > Done.
Step 5. Search for the app, then tap the download button if you want to install it.
Step 1. Go to click your name at the bottom of the sidebar in the App Store app on your Mac.
Step 2. Click Account Settings at the top of the screen, then sign in with your Apple ID.
Step 3. Scroll to Hidden Purchases, then click Manage to see the detailed apps.
Step 4. Find the app that you want to unhide and click Unhide, then click Done.
Step 5. Go back to browse all the purchased apps in your Purchased list.
Part 4. Extra Tip: Keep Apple Music Forever
In fact, if you don't like certain music too much, the better way is to subscribe to Apple Music, instead of purchasing music in iTunes. All the music purchased from iTunes are not shareable, so you are only allowed to listen to iTunes music within iTunes or the Apple Music app. If you have many songs or albums purchased from iTunes, you can remove DRM from iTunes and convert iTunes music to MP3 for playing anywhere.
All you have to do is to use a smart and exclusive iTunes M4P converter like ViWizard Audio Converter. It can help you convert iTunes music and audiobooks to MP3 or other popular formats so that you can freely transfer iTunes music to any device or media player. Fore more details about this software, you can download the free version or follow the below guide.
You May Be Interested


Dave Henry, a multimedia technologist at ViWizard, focuses on delivering the best solutions for digital media challenges, including audio and video conversion, media optimization, and troubleshooting.
Leave a Comment (0)