


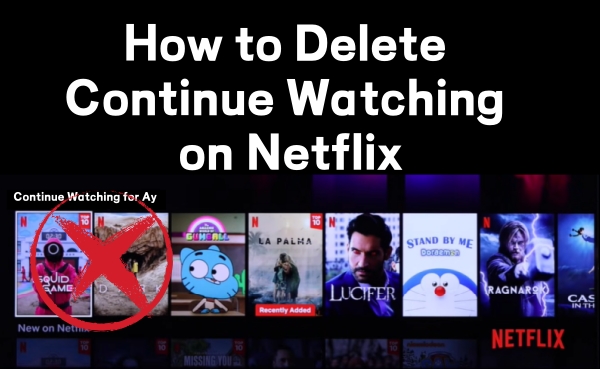
Today, millions of people around the world subscribe to Netflix, enjoying its vast collection of movies, shows, and original titles. To help users quickly jump back into what they were watching, Netflix provides a Continue Watching row. With this feature, users can quickly resume the titles they were watching previously. This makes it easy for you to keep track of the viewing progress.
However, what if you lose interest in some titles? What if you've already finished a movie, and it stubbornly remains in your Continue Watching list? This guide will show you how to remove titles from the row and how to fix if it is missing or moving. Also, this guide provides a method to preserve your Netflix viewing progress while you watch offline.
Part 1. Can You Remove Continue Watching from Netflix?
The short answer is yes. Netflix subscribers can easily remove titles from the Continue Watching row on all devices, including smart TVs, mobile devices, and desktops. The process is quick and simple with no extra verification. Therefore, if you come across a title that's not to your taste, follow the steps below to remove it and make room for something better.
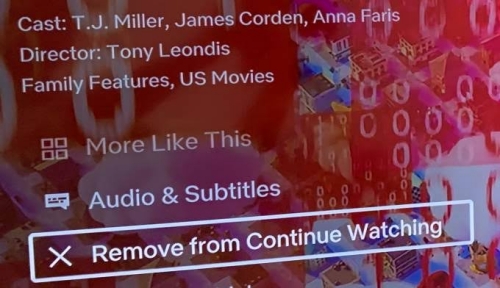
Part 2. How to Delete Continue Watching on Netflix
A title is automatically added to your Continue Watching row after you've watched it for a few minutes. However, to remove it, you'll need to do so manually. Below are the steps to delete items from Continue Watching on different devices.
On Mobile Device
Since Netflix works especially well on mobile devices, removing titles from the Continue Watching list on your phone or tablet is quick and convenient. Just make sure your Netflix app is up to date, then follow the steps below.
01Log in to your profile in the Netflix app.
02Scroll and locate the Continue Watching row.
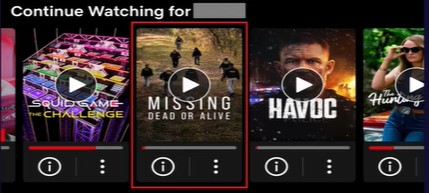
03Swipe and find the title you want to delete.
04Click the three-dot icon below the content you want to remove.
05Choose Remove From Row or Remove From Continue Watching.
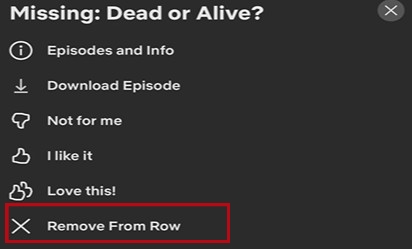
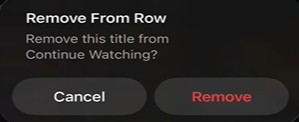
06Choose the Remove option in the confirmation pop-up. Then, this item will be deleted.
On Smart TVs or TV Streaming Devices
Although the exact options may differ from one TV to another, the steps below apply to most smart TVs and TV streaming devices. Follow them to remove unwanted titles.
01Open Netflix on your TV.
02Press the down button on your remote and find the Continue Watching row.
03Use the right and left buttons on your remote to highlight the unwanted item.
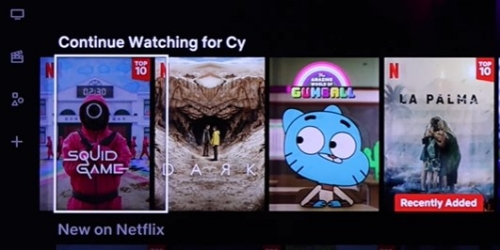
04Once you locate the unwanted title, select it.
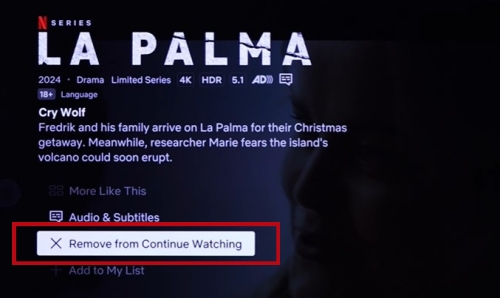
05Use the down button on the remote to scroll down. Select Remove From Continue Watching once you see it. Then, it will be removed. If you suddenly realize you've selected the wrong title, click Undo Remove to cancel your change.
On Desktops
As it is on mobile devices and TVs, the steps on desktops are also easy to follow.
01Go to Netflix on your browser. Log in to your Netflix account and make sure it's on your profile.
02Scroll down and find the Continue Watching row.
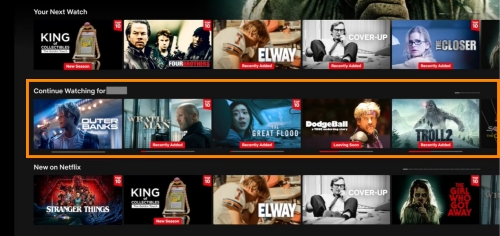
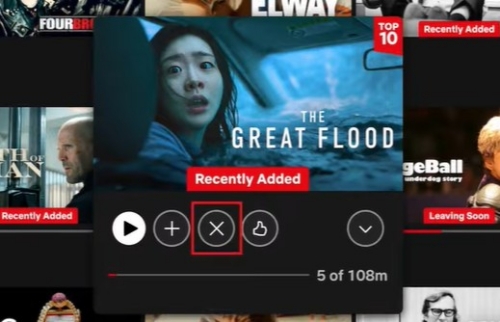
03Hover your mouse over an unwanted Netflix title. A small window about this title will pop up.
04Click the X icon to delete the item.
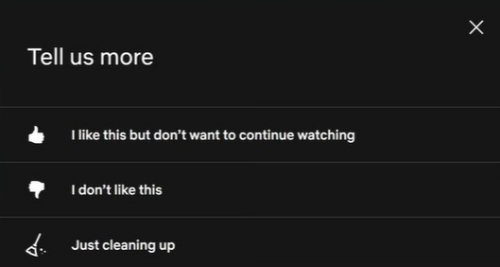
05Choose why you want to delete the title. Alternatively, click X if you're unwilling to answer.
Part 3. How to Fix Netflix Continue Watching Missing or Moving
Sometimes, the Netflix Continue Watching row may go missing or move around, causing a lot of inconvenience. Don't panic. While Netflix doesn't yet offer an official fix for this issue, you can try clearing the cache and updating the app. This method may also work if titles you've removed don't disappear right away.
Clear Cache
Sometimes the problem may be caused by corrupted temporary files, so you can clear the cache of your Netflix app or your browser. Here are the steps for you on all devices.
On Android, long-press the Netflix app on your home screen. Click the info icon > Storage (or Storage & Cache) > Clear Cache. You can also go to the Settings app, select Netflix in the Apps section, and follow these steps. On iOS, you can reinstall Netflix to clear the cache. You also adopt this way on Android.
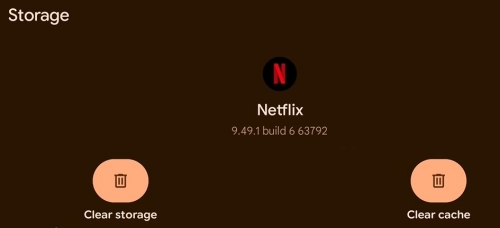
On TV, go to the settings section first by pressing the settings or menu icon on the remote. Go to the apps section, select Netflix, and choose clear cache. On some TVs, you should go to Support and find the Netflix app in the device care section.
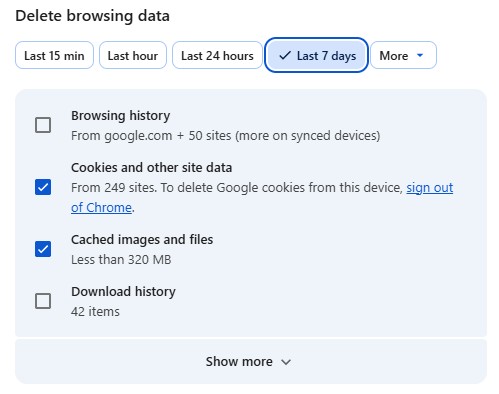
On a desktop, you should clear the cache in your browser. Go to the history page and choose to clear the cache there. Alternatively, go to settings and then the privacy section. Choose to delete browsing data.
Update Netflix
Since the option to remove titles from Continue Watching is only available in the latest version of the Netflix app, these issues may also stem from using an outdated app. Update Netflix to ensure all Netflix features are available and working properly, including the Continue Watching feature.
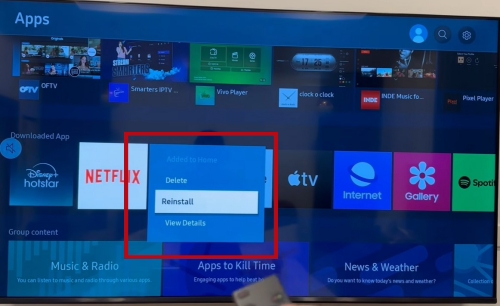
You can update Netflix in the app store on mobile devices, Google TV, LG TV, and Apple TV. On other TVs, open the settings menu and go to the apps section. Select Netflix. Then you can choose to update it, reinstall it, or auto update. All works well. If there are no such options, choose to uninstall it and then reinstall it.
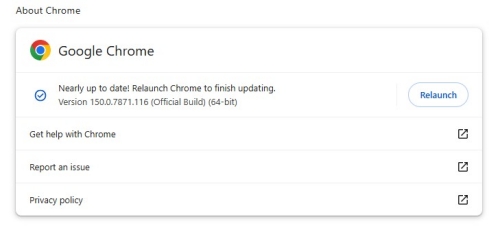
On a desktop, click the menu icon on your toolbar. Click Help and then choose About Chrome (or About Microsoft Edge if you use this one). It will then check versions and update automatically.
Part 4. How to Keep Netflix Viewing Progress While Watching Offline
Now, with the above methods, you can make the most of the Netflix Continue Watching feature. However, some problems persist without a reliable fix. Many users rely on the official Netflix app to download videos for long flights or commutes, only to find that the Continue Watching list fails to sync up once they get back online. It can be incredibly frustrating to lose the viewing progress of your Netflix downloads.
ViWizard Netflix Video Downloader offers a better solution. It lets you download your favorite movies and episodes as permanent, high-quality MP4 or MKV files. Unlike the restrictive offline mode of Netflix, these locally saved files can be played on any media player, like VLC. Most modern media players can automatically preserve your playback position. Therefore, your viewing progress will never be lost due to a network error or Netflix bugs.
Why not try it for free and enjoy a smooth, worry-free viewing experience?

Key Features of ViWizard Netflix Video Downloader
Free Trial Free Trial* Security verified. 5, 481,347 people have downloaded it.
- Download Netflix movies and TV shows as MP4 or MKV files
- Preserve HD, 4K, HDR video, audio tracks, and subtitles
- Accelerate downloads when saving long videos or complete seasons
- Remove ads automatically during video downloads
- Save Netflix videos for playback on different devices
 Step 1: Get Access to the Netflix Library
Click the Sign in button after you open ViWizard Netflix Video Downloader. Log in to your Netflix account to access the Netflix library. Your privacy is highly respected, and no personal information is stored.
 Step 2: Confirm Download Settings
Navigate to the download settings by clicking the menu icon. Choose a suitable video format, video quality, audio channel, language, and more. Click OK to apply the settings.
 Step 3: Download Your Preferred Netflix Title
Browse the Netflix library or search for the content. You can also paste the URL of a Netflix tile into the address bar. Click the download icon after you open your preferred Netflix title. Then click Download to start downloading.
 Step 4: Open the Downloads
You can locate the downloads by clicking the folder icon. Then, right-click the video file and choose to open it with any media player, like VLC. You can also open the media player first. In the player, choose to open the video.
Part 5. Conclusion
To remove a title from the Netflix Continue Watching row, users can simply select it and choose the remove option. If the Continue Watching row goes missing or fails to update, you can try clearing the cache or updating Netflix. However, there are still issues with no solutions. Therefore, ViWizard Netflix Video Downloader is a good choice. Download it in MP4 or MKV format and keep the viewing progress with any media player, like VLC.
You May Be Interested




Rick Lee, an IT solutions expert with 25 years of experience, specializes in system optimization, troubleshooting, and security. He's the author of over a dozen books and helps businesses and individuals solve tech challenges.

Leave a Comment (0)